Table of Contents
ToggleThe TV has become the living room anchor for most households, but that doesn’t mean it has to dominate the space or dictate boring furniture placement. Whether you’re working with a cramped apartment or a wide-open great room, thoughtful design around your television can balance function, style, and viewing comfort. This guide walks through practical placement strategies, modern wall designs, furniture arrangements, concealment tricks, and lighting fixes that help your TV blend into (or stand out from) the room on your terms. No fluff, just proven layouts and build-out ideas you can start planning today.
Key Takeaways
- Mount your TV at eye level—40 to 50 inches from the floor to the screen’s center—and position seating 8 to 12 feet away to reduce neck strain and optimize viewing comfort.
- Living room design ideas with TV should prioritize placement opposite windows with blackout shades, wall studs with lag bolts for support, and feature walls using shiplap, 3D panels, or tile to create visual interest without competing with the screen.
- Arrange furniture by floating your sofa a few feet from walls rather than pushing against them, adding secondary seating at 90-degree angles to improve sight lines and maintain conversation flow in open-concept spaces.
- Conceal your TV with sliding barn doors, motorized lift mechanisms, framed art covers, or two-way mirror glass when not in use for a cleaner, more flexible living room aesthetic.
- Layer ambient bias lighting in cool white (6000K–6500K), cable management with cord covers or in-wall kits, and natural textures like rugs and plants to balance electronics and avoid a sterile appearance.
- Avoid mounting TVs above working fireplaces or in direct glare from east- and west-facing windows, and ensure entertainment centers have ventilated back panels to protect components from heat damage.
How to Choose the Perfect TV Placement for Your Living Room
Start by mapping sight lines from your primary seating. The center of the screen should sit at eye level when seated, typically 40 to 50 inches from the floor to the midpoint of the display. Measure twice before mounting or building cabinetry: a TV hung too high strains necks and ruins the viewing angle.
Consider window placement and natural light. A TV on a wall opposite large windows will catch glare during the day, washing out the picture. If that’s your only option, budget for blackout shades or cellular blinds. East- and west-facing windows cause the worst midday glare.
Wall construction matters for mounting. Locate studs with a stud finder and use lag bolts into 1.5-inch actual dimensional framing (nominal 2×4 or 2×6 studs). Drywall anchors alone won’t support a 55-inch or larger screen safely. If your wall is brick or concrete, you’ll need masonry anchors and a hammer drill.
Distance also dictates screen size. For a 4K display, sit roughly 1 to 1.5 times the diagonal screen measurement away. A 65-inch TV works well at 5 to 8 feet: a 75-inch screen needs 6 to 9 feet. Go smaller if seating is tight, or you’ll be swiveling your head during movies.
Avoid placing the TV above a working fireplace unless you install a heat shield and pull-down mount. Rising heat damages electronics and voids most warranties. A side wall or a non-combusting electric fireplace setup is a safer, code-friendly alternative.
Modern TV Wall Design Ideas That Make a Statement
A feature wall behind the TV can anchor the room and hide cables in one move. Popular materials include shiplap, reclaimed wood planks, acoustic slat panels, and large-format porcelain tile. Each offers texture and depth without competing with the screen.
Shiplap (actual ½-inch or ¾-inch tongue-and-groove pine) installs over drywall with a nail gun and runs about $2 to $4 per square foot for material, depending on grade and region. Paint it a shade darker than surrounding walls to create subtle contrast.
3D wall panels, made from MDF, PVC, or compressed fiber, add sculptural interest and are lightweight enough for adhesive installation. Cut panels to size with a miter saw, apply construction adhesive, and press into place. Seal seams with caulk and paint for a seamless look.
Built-In Entertainment Centers and Custom Cabinetry
Built-ins offer storage, display space, and a polished finish. Frame the unit with 2×2 or 2×4 studs, sheath with ½-inch plywood or MDF, then face with hardwood or pre-primed trim. Standard entertainment center depth runs 16 to 20 inches to accommodate components and ventilation.
Include a ventilated back panel or open rear cavity for cable management and airflow. AV receivers and game consoles generate heat: blocking airflow shortens their lifespan. Route power and HDMI through conduit or in-wall rated cable raceways to meet NEC Article 800 if running through finished walls.
Paint-grade cabinetry uses MDF with a high-build primer. For stain-grade, use birch or oak plywood and match grain direction. Add LED strip lighting inside open shelves for ambiance, low-voltage 12V or 24V strips with a plug-in transformer are DIY-friendly and don’t require an electrician in most jurisdictions.
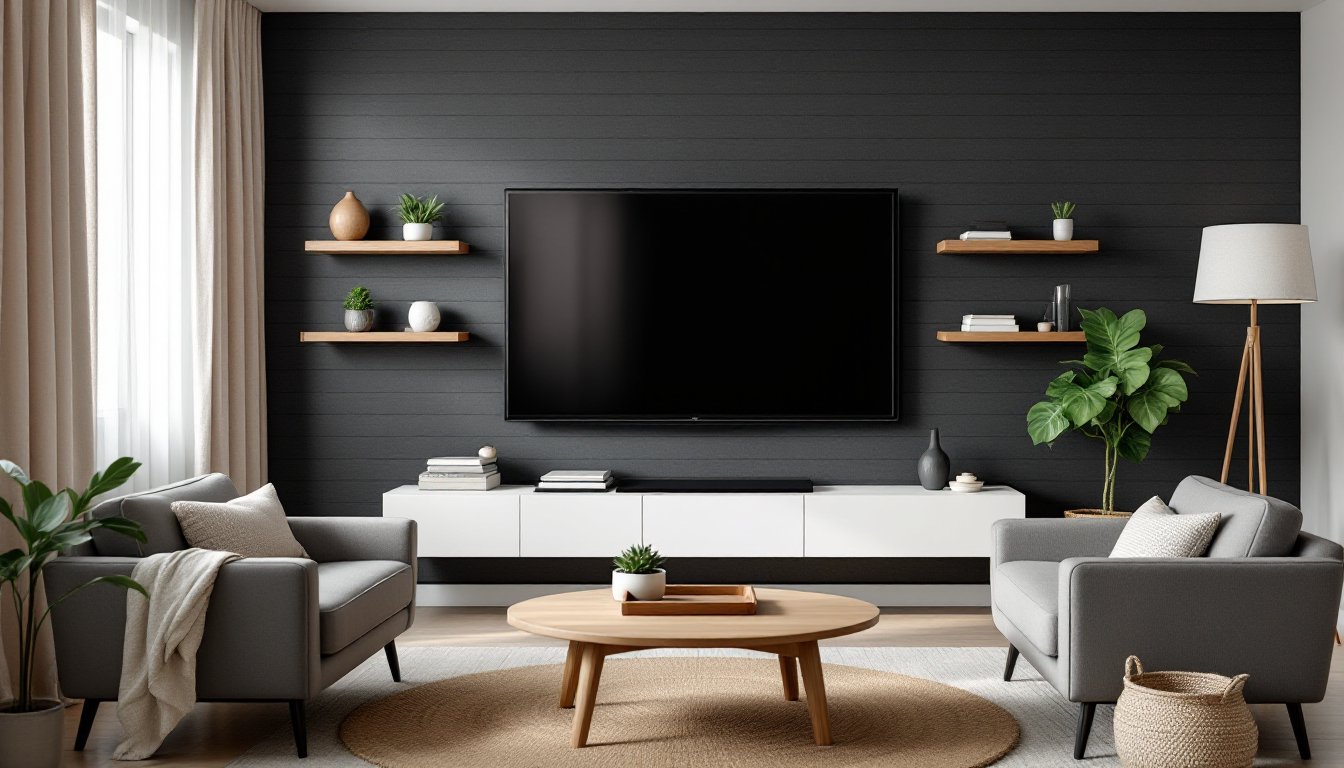
Floating Shelves and Minimalist TV Displays
Floating shelves keep the look light and avoid the boxed-in feel of full cabinetry. Use ¾-inch plywood or solid hardwood with concealed brackets rated for at least 50 pounds per foot of shelf. Mount brackets into studs, not drywall anchors.
Symmetrical shelf placement on both sides of the TV balances the composition. Keep shelves 8 to 12 inches deep to hold books, plants, or small decor without protruding too far into the room. Stain or paint shelves to match trim or feature wall material.
A popular setup pairs a wall-mounted TV with a low media console beneath, 30 inches high or less. This grounds the screen visually and provides closed storage for remotes, DVDs, and cables. Brands like IKEA’s Bestå series offer modular, customizable units: hardwood or live-edge solid-wood consoles give a craft look but cost more. Choose based on your skill level and budget.
Furniture Arrangement Tips for TV-Centered Living Rooms
Position your sofa or primary seating directly facing the TV, 8 to 12 feet back for most screen sizes. If the room is long and narrow, a sectional against the longest wall maximizes seating without blocking pathways.
Add a secondary seating zone, accent chairs at a 90-degree angle or a loveseat perpendicular to the sofa, to keep conversation flexible. This works especially well in open-plan spaces where the living room flows into a kitchen or dining area. Angling chairs slightly inward softens the grid and improves sight lines.
Coffee table placement matters more than most people think. Keep it 14 to 18 inches from the sofa edge for comfortable legroom. If kids or pets are in the mix, a rounded-edge table or upholstered ottoman prevents shin bruises.
Avoid pushing all furniture against walls. Floating a sofa a few feet out creates a cozier grouping and leaves space for a sofa table or floor lamp behind. This also hides power strips and charging cables.
In small rooms, wall-mount the TV and use a narrow console (12 inches deep or less) to free up floor space. Armless chairs or a compact loveseat keep traffic flow open. Resist the urge to cram in a full sectional if it blocks doorways or windows, code requires clear egress paths, and a cramped layout just feels bad.
Concealing Your TV: Creative Solutions for a Cleaner Look
Not every living room needs the TV on display 24/7. Several smart concealment options exist for those who want flexibility without sacrificing function.
Sliding barn doors or panels on a ceiling-mounted track can cover the TV when not in use. Use ¾-inch MDF or solid-core doors for stability: lighter hollow-core doors flex and rattle. Install the track into ceiling joists with lag screws. Kits are available from hardware stores, but custom sizing often requires cutting your own door and buying track by the foot.
Lift mechanisms hide the TV inside a cabinet or credenza and raise it with a remote. These require a 120V outlet inside the cabinet and enough vertical clearance (measure screen height plus 4 to 6 inches). Manual lift kits start around $150: motorized versions run $400+ depending on weight capacity. Installation involves mounting a steel bracket and running low-voltage control wire, doable for a confident DIYer with basic electrical knowledge.
Framed TV art covers turn the screen into faux artwork when idle. Magnetic frames attach directly to the bezel: swap prints seasonally. Some higher-end TVs (like Samsung’s The Frame) have built-in art modes and slim bezels designed for this approach. For standard TVs, DIY a simple 1×2 or 1×3 wood frame, miter the corners, and attach with velcro or small neodymium magnets.
Mirror TV glass is a more advanced option: a two-way mirror panel in front of the screen that becomes transparent when the display is on. This requires a custom-cut piece of dielectric mirror glass and a slim air gap (usually ½ inch to 1 inch). It’s not a beginner project, hire a glass fabricator and an AV installer unless you’re comfortable with precise measurements and mounting.
Lighting and Decor to Complement Your TV Setup
Ambient lighting behind the TV, called bias lighting, reduces eye strain and improves perceived contrast. LED strip lights in the 6000K to 6500K color temperature range (cool white) work best. Stick the strip to the back of the TV or mount, plug into a USB port on the TV, and it powers on automatically.
Avoid placing lamps or sconces directly in your peripheral vision while watching. Side-table lamps should sit below or level with eye line when seated. Use dimmers to dial intensity down during movie nights. Many modern design approaches layer multiple light sources at different heights to avoid harsh shadows.
Wall decor around the TV should enhance, not compete. A gallery wall with identical frames creates rhythm: mismatched frames can look chaotic unless you stick to a tight color palette (all black, all natural wood, all white). Keep art pieces at least 4 to 6 inches from the TV edge to avoid a cluttered look.
Plants add life without visual noise. A tall fiddle-leaf fig or snake plant in a floor planter flanking the TV softens hard edges. Avoid placing plants directly on top of AV components, water damage and blocked vents are real risks.
Cable management is non-negotiable. Use paintable cord covers, in-wall cable kits (must be NEC-rated for in-wall use), or a simple cable sleeve to bundle and hide wires. A clean install makes even a budget TV look intentional. For DIYers comfortable with drywall repair, cutting a small channel behind the wall and fishing cables through is the gold standard, just make sure you’re not drilling into plumbing or electrical lines. Use a stud finder with wire-detection mode, and if you’re unsure, call a low-voltage installer.
Texture around the entertainment area ties the room together. Layering a natural fiber rug, linen curtains, and woven baskets for remote storage brings warmth that balances the tech. Many current interior design trends emphasize mixing organic materials with clean-lined electronics to avoid a sterile, showroom feel.