Table of Contents
ToggleThe space beneath an elevated deck is usually one of two things: a storage zone for lawn equipment and spiders, or a rain gutter for the patio below. Neither is ideal if you’re trying to maximize usable outdoor living space. Installing an under deck ceiling changes that equation. It creates a dry, finished area underneath your deck that can serve as a shaded lounge, outdoor kitchen, or workshop, without building an entirely new structure. The key is choosing a system that manages water runoff while fitting your budget, tool skill level, and aesthetic preferences.
Key Takeaways
- An under deck ceiling system transforms wasted space beneath an elevated deck into a dry, usable outdoor room while managing water runoff through proper sloped design and gutter placement.
- Vinyl systems are the easiest and most affordable retrofit option at $8–$12 per square foot, while aluminum offers superior durability and a modern look at $10–$15 per square foot.
- Proper drainage with a minimum 1/4 inch slope per foot is non-negotiable for any under deck ceiling installation; water must drain away from the foundation to prevent damage.
- Tongue and groove wood ceilings provide a high-end aesthetic but require a separate drainage membrane, are labor-intensive to install, and need regular sealing to maintain appearance.
- Corrugated metal panels offer the most budget-friendly solution at $1.50–$3 per square foot with an industrial style, though rain noise can be an issue without sound-dampening insulation.
- Always verify local building codes, check deck structural capacity for added weight, and hire a licensed electrician for any electrical work like recessed lighting or outlets.
Why Install an Under Deck Ceiling System?
An under deck ceiling does more than just look polished. It solves real functional problems.
First, water management. Rainfall that seeps through deck boards turns the area below into a drip zone. A properly installed ceiling system channels that runoff into gutters or drainage troughs, keeping the space underneath dry. This protects anything stored below and makes the area usable year-round.
Second, usable square footage. If your deck is elevated over a concrete patio or walkout basement entrance, finishing the ceiling turns wasted vertical space into a covered outdoor room. You can add ceiling fans, lights, or even a mounted TV without worrying about weather exposure.
Third, aesthetic finish. Exposed joists, hardware, and the underside of decking aren’t pretty. A clean ceiling creates a more intentional, finished look, especially important if the underside is visible from windows or living areas.
Before starting, check local building codes. Some jurisdictions classify under deck systems as alterations requiring a permit, especially if you’re adding electrical or modifying drainage around the foundation. If your deck is load-bearing or attached to the house structure, consult a licensed contractor about proper flashing and moisture barriers.
Vinyl Under Deck Ceiling Systems
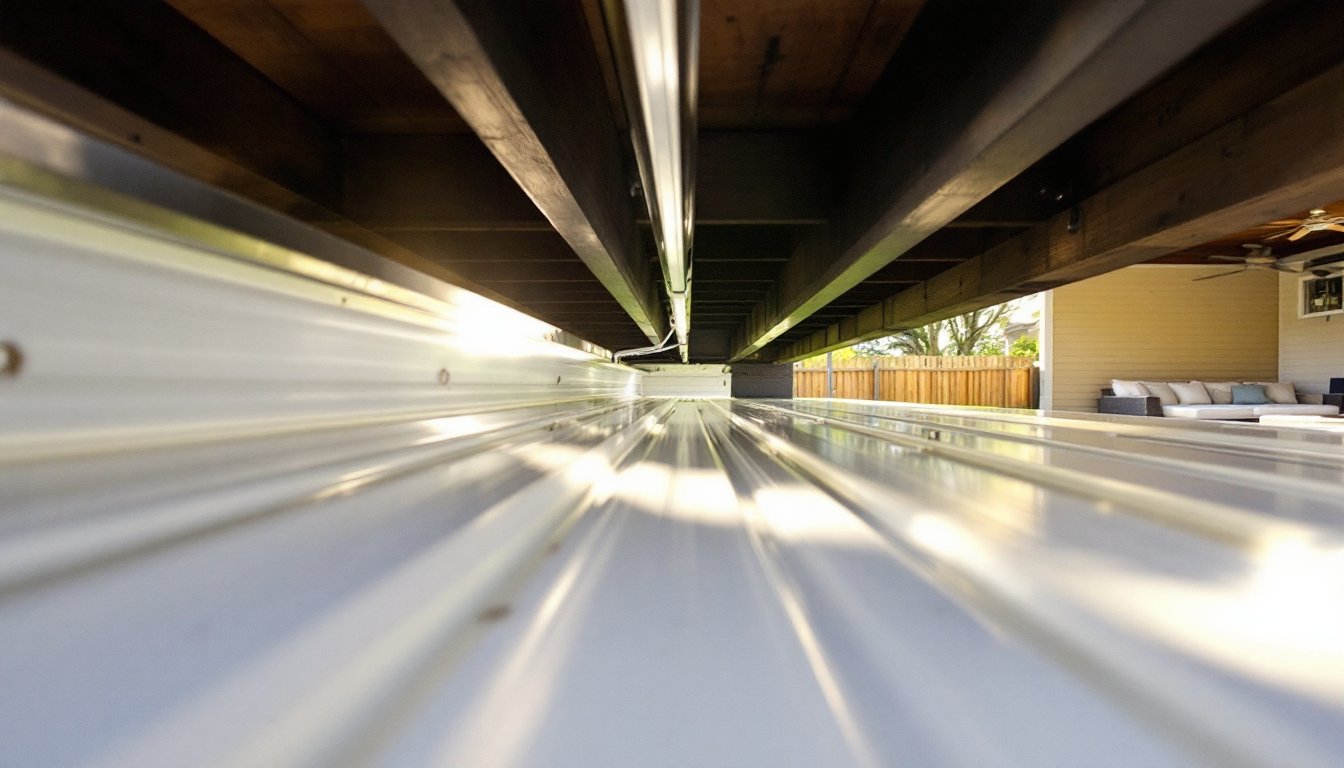
Vinyl systems are the most common retrofit option for existing decks. They’re engineered specifically for under deck use, with interlocking panels that hang from the joists and slope slightly to direct water toward a perimeter gutter.
Most vinyl systems use a track-and-panel design. You mount aluminum or vinyl tracks to the underside of each joist, then snap panels into place. The panels have a built-in pitch (usually around 1/4 inch per foot) that channels water into a collection trough running along the deck’s edge. From there, downspouts or drainage extensions carry water away from the foundation.
Installation is straightforward but time-consuming. You’ll need a drill, tin snips or a utility knife, a level, and a tape measure. Most manufacturers provide joist-mounted brackets that don’t require cutting into the deck structure itself. Plan for a helper, wrestling 10-foot panels overhead solo gets tiring fast.
Vinyl is low-maintenance and won’t rot, but it can look utilitarian. White or beige are standard colors: some brands offer woodgrain textures that mimic tongue and groove. Expect to pay $8–$12 per square foot for materials, not including gutters or downspouts.
One downside: vinyl can become brittle in extreme cold. If you live in a climate with harsh freeze-thaw cycles, confirm the product is rated for your region. Also, check the warranty, some manufacturers void coverage if panels are installed over heated spaces like basements.
Aluminum Panel Under Deck Ceilings
Aluminum offers a step up in durability and a cleaner, more contemporary look. Panels are typically corrugated or flat-seam, and they install similarly to vinyl, mounted to joist tracks with a slight slope for drainage.
Unlike vinyl, aluminum won’t warp, fade, or crack. It’s also fire-resistant, which matters if you’re installing the ceiling above a grill area or fire pit. Many systems come pre-painted in white, bronze, or gray: powder-coated finishes hold up better than paint over the long term.
Installation requires metal snips or a circular saw with a metal-cutting blade. Wear gloves and safety glasses, cut edges are sharp. Because aluminum conducts heat, avoid installing directly under a deck that gets full sun if you plan to use the space below in summer: radiant heat can make the area uncomfortable.
Aluminum systems cost more than vinyl, around $10–$15 per square foot, but they last longer and require almost no maintenance. If you’re integrating recessed lighting or ceiling fans, aluminum’s rigidity makes mounting hardware easier compared to vinyl’s flex.
One tip from advanced construction techniques used by professionals: add a layer of foam insulation board between the joists and the aluminum panels if the deck sits above conditioned space. This reduces condensation and improves thermal separation.
Tongue and Groove Wood Ceilings
For a natural, high-end look, tongue and groove wood is hard to beat. Cedar, pine, or composite wood boards install perpendicular to the joists, with each board locking into the next via a tongue-and-groove edge.
This approach doesn’t inherently manage water like vinyl or aluminum systems. You’ll need to install a separate drainage membrane above the wood, typically a vinyl or rubberized sheet that lays across the joists before the ceiling boards go up. The membrane slopes toward a gutter, and the wood ceiling is purely cosmetic.
Cedar is the most popular choice for outdoor use. It resists rot naturally and weathers to a silver-gray patina if left unsealed. If you prefer to maintain the original color, plan on applying a UV-blocking sealer every 2–3 years. Pine is cheaper but requires treatment with a water-repellent stain or paint.
Installation is labor-intensive. You’ll fasten each board to the joists using finish nails or hidden fasteners (like the Camo system). A miter saw is essential for clean cuts, and you’ll want a nail gun unless you enjoy hand-nailing hundreds of boards overhead. Expect installation to take 2–3 times longer than a snap-together vinyl system.
Material costs run $4–$8 per square foot for the wood, plus another $2–$4 for the drainage membrane and fasteners. If you’re comfortable with woodworking and want the ceiling to match a cabin or rustic aesthetic, it’s worth the effort. For design inspiration and beginner-friendly methods, many DIYers reference woodworking project tutorials to adapt framing and finishing techniques.
Corrugated Metal and Industrial Style Options
Corrugated metal sheets offer a budget-friendly, industrial-modern aesthetic. Galvanized steel or tin panels install quickly and handle water runoff naturally due to their ribbed profile.
You can mount corrugated panels directly to the joists using roofing screws with rubber washers (to prevent leaks at fastener points). Overlap sheets by one corrugation and seal seams with butyl tape or roofing caulk. Slope the panels slightly, 1/4 inch per foot minimum, and add a gutter along the low edge.
Metal roofing panels are sold at most home centers in 8- or 10-foot lengths. Pricing is around $1.50–$3 per square foot, making this one of the cheapest options. The tradeoff is noise: rain on metal is loud. Some homeowners don’t mind: others find it distracting.
For a quieter setup, add sound-dampening insulation between the joists before installing the metal. Fiberglass batts work, but make sure they’re faced with a vapor barrier on the warm side (typically toward the living space if the deck is over a basement).
Corrugated metal pairs well with modern farmhouse or loft-style outdoor areas. Paint or leave raw for a weathered look. Wear gloves and long sleeves, edges are sharp, and galvanized dust can irritate skin. A circular saw with a metal blade or tin snips will handle cuts, but expect some burrs. Deburr edges with a file before installation.
DIY Under Deck Drainage and Ceiling Installation Tips
The single biggest mistake in DIY under deck ceiling projects is ignoring drainage. No matter which material you choose, water has to go somewhere.
Slope is non-negotiable. Whether you’re using vinyl, aluminum, wood with a membrane, or metal, ensure at least a 1/4 inch drop per foot of run. Use a 4-foot level and shims to confirm pitch before locking anything in place.
Gutter placement matters. Most systems direct water to a trough mounted along the outside joist. Make sure that trough drains to daylight or connects to your home’s downspout system, never dump runoff against the foundation.
If you’re retrofitting an existing deck, joist spacing may not be ideal. Standard deck joists are 16 inches on center: some ceiling systems prefer 12 or 24 inches. Check manufacturer specs. You may need to add blocking or furring strips.
For electrical work, adding recessed lights or outlets, hire a licensed electrician or pull a permit if required. The National Electrical Code (NEC) requires GFCI protection for outdoor receptacles, and fixtures must be rated for damp or wet locations depending on exposure.
Tool-wise, you’ll get by with a drill, circular saw, level, tape measure, and tin snips for most systems. A miter saw helps if you’re doing wood tongue and groove. Always wear safety glasses and gloves, especially when cutting metal or working overhead.
Finally, check your deck’s structural condition before adding weight. Most under deck ceilings are light, but if you’re planning to mount ceiling fans, a projector, or heavy light fixtures, confirm the joists can handle the load. When in doubt, consult the expert contractor recommendations for guidance on load-bearing limits and safe installation practices.
Conclusion
Finishing the underside of a deck turns unused vertical space into a functional outdoor room. Whether you go with vinyl for ease, aluminum for longevity, wood for warmth, or corrugated metal for budget and style, the key is proper drainage and realistic assessment of your skill level. Measure twice, confirm slope, and don’t skip the gutter system, water management is what makes the project work long-term.