Table of Contents
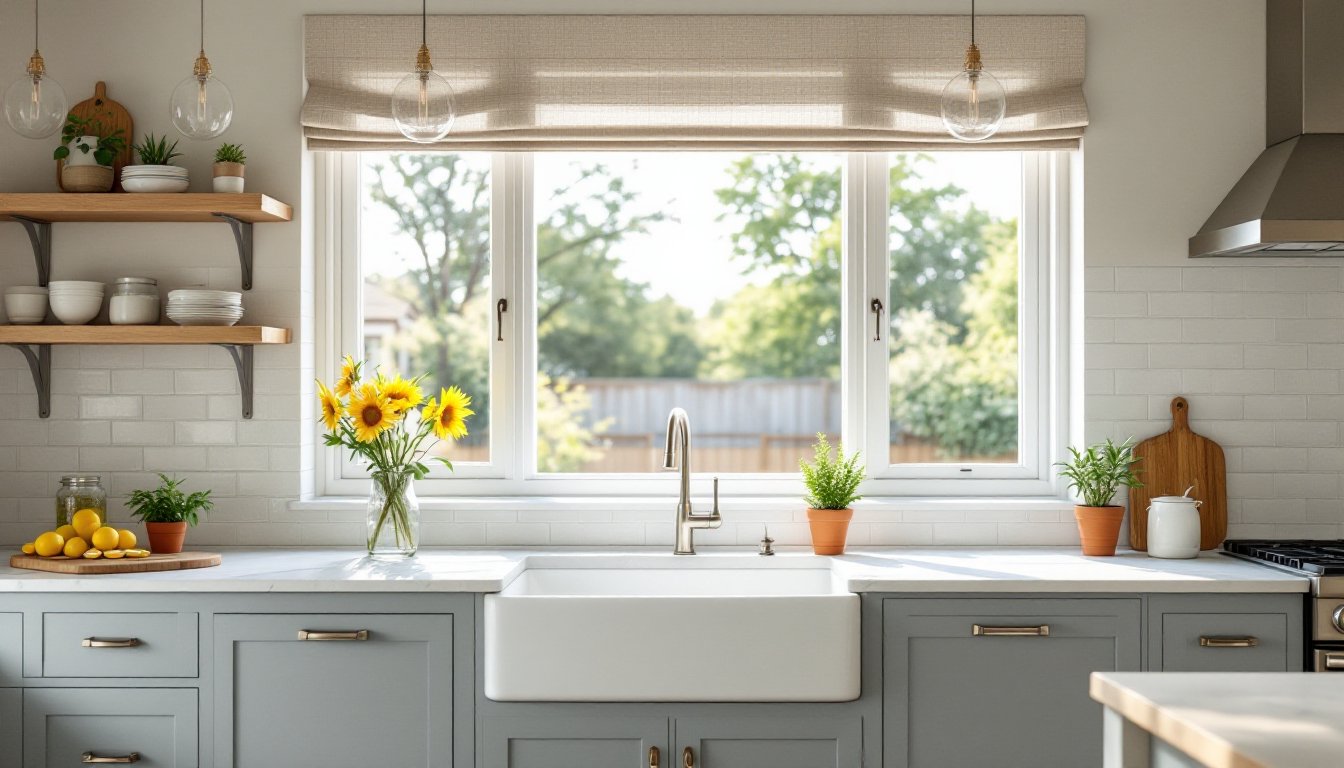
ToggleMost homeowners obsess over backsplashes, countertops, and cabinet hardware, then slap flat white paint on the ceiling and call it done. That’s a missed opportunity. The ceiling is the largest unbroken surface in most kitchens, and a thoughtful design choice up there can make the room feel taller, cozier, or more polished without touching a single base cabinet. Whether working with an 8-foot standard ceiling or a vaulted great-room setup, the right treatment adds character and can even solve acoustic or lighting challenges that flat drywall leaves unaddressed.
Key Takeaways
- Kitchen ceiling design ideas go far beyond flat white paint—coffered, exposed beams, and tray ceilings add character, perceived height, and visual interest to the room’s largest unbroken surface.
- Coffered ceilings work best with 9-foot or higher ceilings and use MDF, polyurethane moldings, or lumber grids finished in contrasting colors to emphasize architectural geometry.
- Faux polyurethane beams offer lightweight, budget-friendly alternatives to heavy reclaimed wood while delivering the rustic charm of exposed beams in farmhouse and industrial kitchens.
- Tray ceilings create dimension by raising a central section 6–12 inches above the perimeter, and can be enhanced with two-tone paint and LED strip lighting for a floating effect.
- Wood planks and shiplap bring organic warmth to modern farmhouse kitchens, while pressed tin tiles and metal accents deliver vintage or industrial aesthetics with minimal maintenance.
- Proper kitchen ventilation through an exterior-ducted range hood is critical to protect ceiling finishes from grease buildup, moisture damage, and discoloration regardless of material choice.
Why Your Kitchen Ceiling Deserves More Attention
Ceilings account for roughly one-sixth of a room’s visible surface area, yet they’re routinely neglected in renovation budgets. In kitchens, that oversight is especially glaring. Cooking generates heat, moisture, and grease vapor, all of which migrate upward. A well-designed ceiling can incorporate ventilation grilles, recessed or pendant lighting, and finishes that resist staining better than basic latex paint.
From a spatial standpoint, ceiling treatments influence perceived room height. A tray ceiling with a slightly raised center panel draws the eye upward, making an 8-foot ceiling feel closer to 9 feet. Conversely, exposed beams can lower the visual plane in a room with soaring clearance, creating intimacy in an open-concept layout. Paint sheen matters, too: flat white absorbs light and hides imperfections, while satin or eggshell reflects ambient and task lighting, brightening the workspace below.
Structural considerations come into play when adding dimensional elements. Load-bearing joists typically run 16 inches on center in platform-framed homes, and any ceiling modification, coffered grids, beam wraps, or heavy tile, must account for joist direction and spacing. If the plan involves cutting into drywall or adding significant weight, consult local building codes (usually governed by the International Residential Code, IRC) and consider whether a permit is required. Most decorative treatments that don’t alter framing or electrical rough-in are cosmetic and permit-exempt, but verify with the local building department before starting demo.
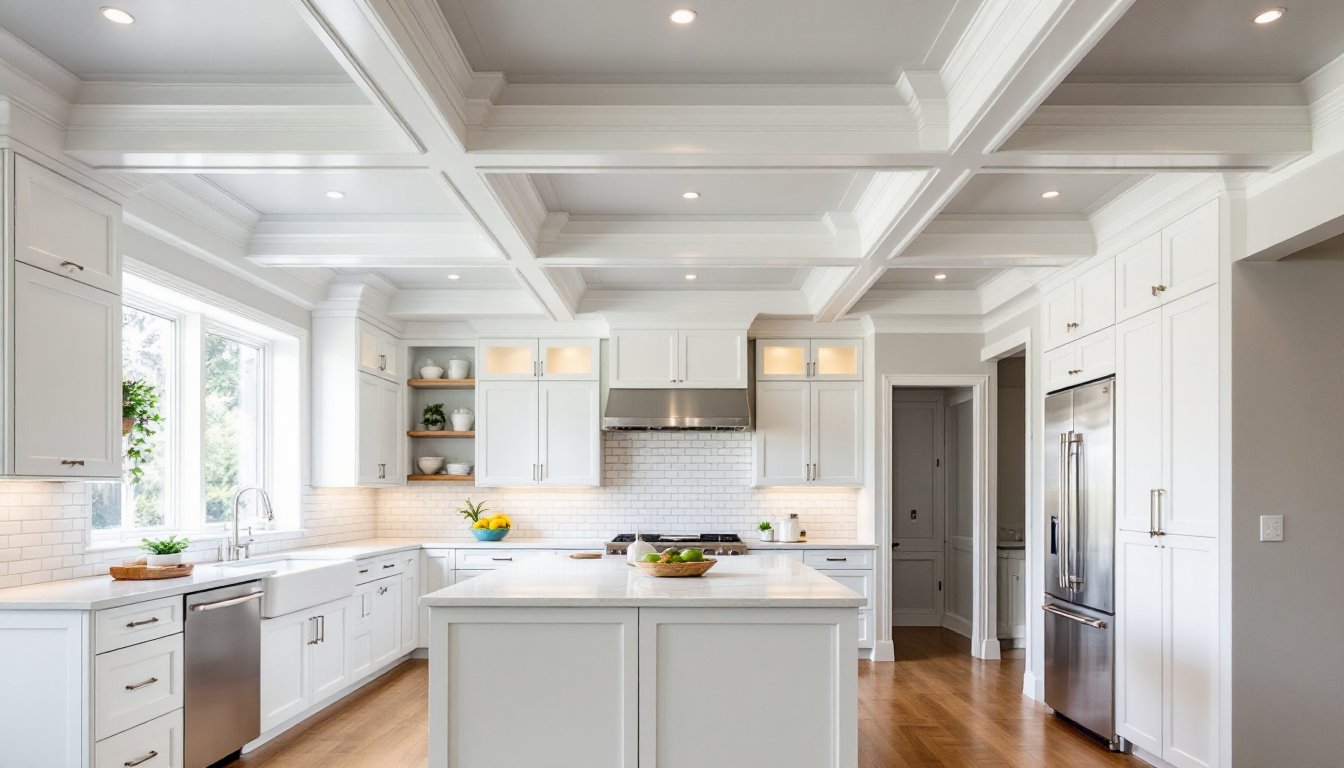
Coffered Ceilings: Adding Architectural Elegance to Your Kitchen
Coffered ceilings feature a grid of recessed panels bordered by beams, traditionally built from solid lumber but more commonly assembled today using medium-density fiberboard (MDF) or polyurethane moldings. The result is a geometric pattern that adds depth and a formal, high-end look, think library or parlor, translated into the kitchen.
Installation involves snapping chalk lines to lay out the grid, then attaching 1×4 or 1×6 nominal lumber (actual dimensions 3/4″ × 3.5″ or 3/4″ × 5.5″) to the ceiling joists or directly to existing drywall with construction adhesive and finish nails. Intersections are mitered at 45 degrees: a miter saw gives the cleanest cuts, though a coping saw works for interior corners if the budget doesn’t allow power tools. Crown molding around each coffer panel dresses up the transitions and hides any gaps.
Paint is critical. The beams are typically finished in a contrasting color, semi-gloss white beams against a satin gray or soft blue panel, for example, to emphasize the geometry. Because kitchens see humidity and airborne grease, use a scrubbable acrylic paint rated for kitchens and baths, and plan on two coats after a stain-blocking primer.
Coffered designs work best in kitchens with at least 9-foot ceilings: anything lower risks a claustrophobic, heavy appearance. In open-plan kitchens that flow into dining or living areas, extending the coffer grid across the full space creates continuity. Budget planning should include materials (MDF, molding, fasteners, paint) and time, a 12×14-foot kitchen ceiling can take a full weekend for two people, plus drying time between primer and topcoats.
Exposed Beams for Rustic Charm and Character
Exposed beams bring warmth and texture, especially in farmhouse, cottage, or industrial-style kitchens. True structural beams, solid sawn timber or engineered lumber like glulam, are rarely exposed in modern construction: what most DIYers install are decorative beam wraps or faux beams made from hollow wood boxes or high-density polyurethane foam molded to mimic reclaimed lumber.
Faux beams are lightweight (a typical 8-foot polyurethane faux beam weighs under 10 pounds), easy to cut with a standard handsaw or miter saw, and slip over a mounting cleat, a 2×4 or 2×6 screwed directly into ceiling joists. Locating joists is non-negotiable: use a stud finder with joist-scan mode, and verify by drilling small pilot holes if necessary. Fasten the cleat with 3-inch wood screws every 16 inches, then slide the beam over it and secure with finish nails or construction adhesive.
Real reclaimed wood beams, salvaged from old barns or mills, add authenticity but come with challenges. They’re heavy (a 6×6 timber beam can weigh 5–7 pounds per linear foot), may harbor insects or mold, and often need cleaning, sanding, and sealing before installation. They also require serious blocking or sister joists to carry the load safely. For most DIYers, polyurethane or pine box beams (built from 1×6 boards mitered into a three-sided channel) offer better control over finish, weight, and cost.
Beam spacing depends on ceiling width. In a 10-foot-wide kitchen, two beams placed roughly 3 feet from each wall and 4 feet apart create balanced rhythm. Stain or paint beams before installation, semi-transparent stain on polyurethane gives a weathered look, while dark walnut or espresso stain on real wood adds contrast against white or light-gray drywall. When planning broader renovation projects, coordinating beam style with cabinetry and flooring ensures a cohesive result.
Tray Ceilings: Creating Depth and Visual Interest
A tray ceiling (also called an inverted or recessed ceiling) features a central section raised 6 to 12 inches above the surrounding perimeter, creating a stepped or tiered profile. It’s a subtle way to add dimension and works especially well in kitchens with standard 8-foot ceilings, where it mimics the effect of extra height without structural changes.
Building a tray ceiling from scratch requires framing a dropped border around the room’s perimeter using 2×4 or 2×6 lumber, hanging new drywall on the lowered frame, and finishing seams with joint compound and tape. The central section remains at the original ceiling height. This is a multi-day project: framing, electrical relocation (if recessed lights sit in the drop zone), drywall hanging, mudding, sanding, priming, and painting. Plan on help, full sheets of 1/2-inch drywall weigh about 50 pounds and are unwieldy overhead.
For existing tray ceilings (common in homes built after 2000), the design opportunity lies in paint and lighting. A two-tone scheme, such as the perimeter in warm white and the raised center in pale sage or soft taupe, emphasizes the architecture. LED strip lighting or rope lights installed in a cove along the border casts indirect light upward, washing the center panel and creating a floating effect after dark. Use low-voltage LED tape rated for 3000K (warm white) to avoid the harsh, bluish cast of higher color temperatures.
Tray ceilings pair well with ceiling fans or statement pendant fixtures, since the raised center provides extra clearance and visual separation. When selecting paint, choose a finish one step glossier than the walls, if walls are eggshell, use satin on the ceiling, to reflect light without showing every drywall imperfection. Ceiling paint typically covers 350–400 square feet per gallon, so measure the ceiling area (length × width) and buy accordingly, rounding up for a second coat.
Modern Kitchen Ceiling Materials and Finishes
Beyond traditional drywall and paint, a range of materials can introduce texture, color, and personality overhead. Choosing the right finish depends on the kitchen’s style, the existing structure, and how much prep work the surface needs.
Wood Planks and Shiplap
Tongue-and-groove planks or shiplap boards bring organic warmth and are especially popular in modern farmhouse and Scandinavian-style kitchens. Pine, cedar, or poplar are common species: pine is affordable and accepts stain well, cedar resists moisture naturally (helpful near ranges and sinks), and poplar has a fine grain that takes paint smoothly.
Planks are typically 1×6 nominal (actual 3/4″ × 5.5″) and install perpendicular to ceiling joists using a finish nailer and 2-inch 18-gauge brad nails. Locate joists first and mark them with a pencil line: planks must hit solid backing every 16 or 24 inches. Tongue-and-groove boards lock together along the long edges, hiding fasteners: shiplap has a rabbet joint that creates a slight shadow line between boards. Both require a miter saw or circular saw for crosscuts and a table saw or track saw for rip cuts around light fixtures or vents.
Finish options range from clear polyurethane (two coats, sanding between with 220-grit) to whitewash (diluted latex paint wiped on and partially removed) to opaque paint in Sherwin-Williams Extra White or Benjamin Moore Chantilly Lace. Priming is essential if painting: use a stain-blocking primer to prevent wood tannins from bleeding through topcoats. Design-focused resources often showcase plank ceilings in neutral palettes that complement open shelving and natural-finish cabinetry.
Tin Tiles and Metal Accents
Pressed tin tiles were ubiquitous in early-20th-century commercial kitchens and have seen a revival in vintage and industrial interiors. Modern versions are stamped from lightweight aluminum or steel in patterns that mimic Victorian-era designs, florals, geometric grids, and beadboard textures. Tiles are typically 24×24 inches or 24×48 inches and install over furring strips or directly to drywall using construction adhesive and small nails or screws in the tile flanges.
Prep is straightforward: the existing ceiling must be clean, dry, and reasonably flat. Tiles can span minor imperfections, but sagging drywall or water damage should be repaired first. Layout starts at the room’s center: snap intersecting chalk lines, dry-fit tiles to check pattern alignment, then work outward toward walls. Edge cuts are made with aviation snips (straight-cut or left/right-cut depending on the curve). Wear cut-resistant gloves, raw metal edges are sharp.
Finish choices include leaving the mill finish (raw aluminum or galvanized steel) for an industrial look, painting with spray enamel in matte black or copper, or applying a patina solution for an aged verdigris effect. Tin ceilings reflect sound, so they’re best paired with soft furnishings (curtains, upholstered seating) or acoustic panels elsewhere in an open floor plan. Installation over existing popcorn or textured ceilings is possible if furring strips are used to create a flat plane: this adds about 1.5 inches to ceiling drop. Many specialized design platforms feature tin and metal ceiling galleries with installation case studies.
When planning comprehensive updates, coordinating ceiling materials with backsplash tile, cabinet hardware, and lighting fixtures creates a unified aesthetic. For example, brushed-nickel tin tiles pair naturally with stainless-steel appliances and quartz countertops in cool gray tones, while oil-rubbed bronze or black metal complements butcher-block counters and matte-black faucets. Safety note: always wear safety glasses and a dust mask when cutting or drilling metal, metal dust and shavings are irritants and can cause eye injury.
Regardless of material, proper ventilation remains critical. Kitchens generate moisture and grease-laden air, so ensure the range hood is properly ducted to the exterior (not recirculated) and rated for the cooktop’s BTU output, typically 100 CFM per linear foot of range width for gas cooktops. Adequate ventilation protects ceiling finishes from premature yellowing, warping, or corrosion, especially with porous materials like wood or unsealed metal.