Table of Contents
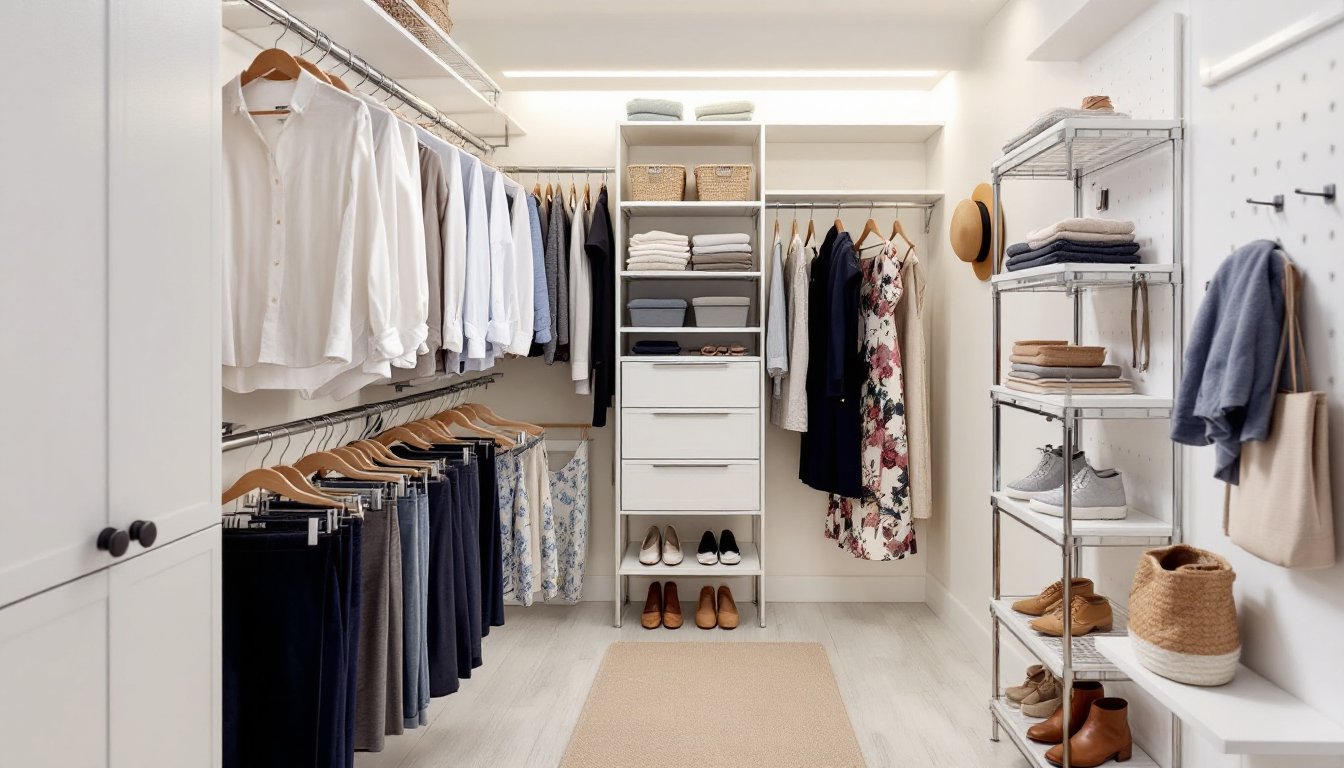
ToggleA small walk-in closet doesn’t have to mean sacrificing organization or style. With the right design strategies, even a 4×4-foot or 5×6-foot closet can deliver the storage capacity of a much larger space. The key lies in smart layout choices, vertical thinking, and multi-functional fixtures that work harder than standard shelving. This guide breaks down practical, field-tested design ideas that homeowners can carry out themselves, from strategic shelf placement to lighting upgrades that visually expand tight quarters.
Key Takeaways
- Small walk-in closet design ideas prioritize vertical space, strategic layouts (L- or U-shaped), and multi-functional fixtures to maximize storage in compact 4×4-foot to 5×6-foot spaces.
- Double-hang rods at 40 inches and 80 inches, adjustable shelving systems, and pull-out bins on drawer glides can double usable storage capacity without expanding the footprint.
- LED strip lighting in 3000K–4000K color temperature and light-colored paint (soft whites, pale grays, or warm beiges) visually expand the closet and eliminate shadows during outfit selection.
- Budget-friendly upgrades like fresh paint ($50–$150), wood shelving with adjustable standards ($40–$80 per wall), and uniform velvet hangers deliver immediate visual improvement and better organization.
- Vertical storage solutions including modular bins, second hanging rods, and shelving extended to the ceiling reclaim dead air while keeping the center aisle 24–30 inches wide for comfortable movement.
Strategic Layout Planning for Small Walk-In Closets
Before installing a single shelf, measure the closet footprint and identify which layout maximizes usable wall space. L-shaped and U-shaped configurations work best in compact walk-ins, keeping the center aisle narrow but functional, typically 24 to 30 inches wide for comfortable movement.
For L-shaped layouts, dedicate the long wall to double-hang rods (one at 40 inches, another at 80 inches from the floor) for shirts, blouses, and folded pants. Reserve the short return wall for a single rod at 66 inches, ideal for dresses or longer coats. In U-shaped setups, use the back wall for shelving or a built-in dresser unit to anchor the design and reduce bedroom furniture sprawl.
Plan rod height based on garment type: short-hang sections need 40–45 inches of vertical clearance, while long-hang areas require 60–70 inches. Actual lumber dimensions matter when building custom supports, a nominal 1×12 shelf is really 3/4″ × 11-1/4″, so factor that into bracket placement.
Avoid centering rods or shelves on walls: instead, align them to one side to create asymmetric zones. This approach often yields more hanging length and dedicated corners for shoe racks or hampers. If the closet shares a wall with plumbing or HVAC, confirm stud locations with a stud finder before anchoring heavy brackets, drywall anchors alone won’t support loaded shelving over time.
Smart Storage Solutions That Double Your Space
Standard closet kits leave significant cubic footage unused. Swapping basic wire shelving for adjustable melamine or plywood systems allows precise customization as wardrobe needs evolve. Shelf dividers, pull-out baskets, and slant-front shoe shelves transform dead air into active storage.
Install pull-out wire bins on drawer glides (rated for 75–100 lbs) for folded sweaters, gym gear, or accessories. These units cost $15–$40 each at home centers and mount to sidewalls with screws driven into studs. Pair them with canvas or felt drawer organizers to prevent items from shifting.
Hooks and pegboards reclaim awkward corners and door backs. A pegboard panel (1/4-inch tempered hardboard) mounted to furring strips provides flexible hanging for belts, scarves, hats, and bags. Use 3-inch spacing between pegs for versatility. Over-the-door racks work for shoes or accessories but check door clearance, many swing-out designs add 4–6 inches to the door’s footprint.
For small closets, many homeowners find inspiration in compact organization strategies that prioritize accessibility over sheer volume. Consider a closet island or narrow dresser (24 inches deep max) if floor space allows. Islands with countertops create a folding surface and jewelry tray station, while drawers below handle undergarments and accessories. Secure freestanding units to walls with furniture anchors to meet tip-over safety standards.
Vertical Storage Systems
Vertical space is the single most underutilized asset in small walk-ins. Extend shelving or hanging rods all the way to the ceiling, use a step stool to access seasonal items stored above the 84-inch mark. Adjustable shelving standards (metal tracks with movable brackets) offer the flexibility to reconfigure as needs change, and they’re easier to install than fixed cleats.
Stack modular storage cubes or clear plastic bins (labeled for quick identification) on upper shelves for out-of-season clothing, luggage, or bulky linens. Transparent bins beat opaque ones for visibility: 12-quart to 18-quart sizes fit most shelves without wasted headroom.
Install a second hanging rod below the primary one using drop-down brackets or chain-link rod doublers. This setup doubles short-hang capacity for shirts, skirts, and folded trousers. Ensure the lower rod sits at least 40 inches from the floor to prevent garments from dragging.
Valet rods or pull-out hooks mounted on side panels provide temporary staging for next-day outfits or dry cleaning. These swing-out rods retract flush when not needed, preserving aisle width. Pair vertical systems with slim velvet or flocked hangers (which grip fabric and reduce shoulder bumps) instead of bulky plastic or wood versions, they save 30–50% more rod space.
Lighting and Color Choices to Expand Your Closet Visually
Poor lighting makes any closet feel cramped and frustrates outfit selection. Swap the standard overhead bulb for LED strip lights or puck lights installed under shelves and along rods. LED tape (in 3000K to 4000K color temperature) delivers bright, shadow-free illumination and draws minimal power, about 4 watts per foot.
Mount strip lighting to the underside of shelves with adhesive backing or aluminum channels for a cleaner look. Run low-voltage wiring through walls if doing new construction, or use plug-in kits with surface-mounted cord covers for retrofits. Motion-sensor switches (about $20–$40) automate lighting and save energy.
Battery-powered LED puck lights work well for renters or quick upgrades, stick them inside cabinets, above rods, or in corners. Expect 50–100 hours of runtime per set of AAA batteries, depending on brightness.
Paint plays a surprising role in perceived space. Light neutrals, soft whites, pale grays, or warm beiges, reflect more light than dark tones, making walls recede visually. High-gloss or semi-gloss finishes (such as those favored in DIY closet makeovers) amplify this effect but show surface imperfections, so prep walls carefully: fill holes, sand smooth, and apply primer before topcoats.
If the closet lacks natural light, consider a mirrored door or back wall. A full-length mirror (at least 48 inches tall) doubles visual depth and serves a functional role. Secure mirrors with mirror clips or adhesive designed for the mirror’s weight, standard construction adhesive won’t hold glass safely.
Avoid bold accent walls or dark cabinetry in tiny walk-ins: they create visual weight that shrinks the space. Instead, use pops of color in bins, hangers, or drawer liners to add personality without overwhelming the room.
Custom Features and Organizational Accessories
Off-the-shelf closet kits rarely fit odd dimensions or personal workflows. Building custom shelving from 3/4-inch plywood or melamine-coated particleboard costs $30–$60 per sheet and allows precise tailoring. Cut shelves to exact widths with a circular saw and a straightedge guide: a miter saw simplifies corner cuts if building an L- or U-shaped system.
Support shelves longer than 36 inches with a center bracket or cleat to prevent sagging. For a professional finish, apply iron-on edge banding to raw plywood edges, it hides the core layers and wipes clean.
Pull-out accessories elevate organization: tie and belt racks, jewelry trays, and pull-down rods (which lower high-hanging items within reach) all increase accessibility. Many mount on full-extension drawer slides rated for 75–100 lbs. Confirm that side panels can support the hardware: thin wire shelving won’t provide a stable anchor.
For shoe storage, slanted shelves (angled at 15–20 degrees) display footwear clearly and save vertical space compared to flat shelves. Build them from 1×6 boards or buy stackable shoe cubbies. A 5-foot-high slanted rack can hold 20–25 pairs in the footprint of a single closet corner.
Drawer inserts for socks, underwear, and accessories prevent the jumbled-drawer syndrome. DIY versions from 1/4-inch plywood or foamcore cost under $10: premade felt or bamboo dividers run $15–$30 per set. Size compartments based on item dimensions, 3-inch squares for socks, 4×6-inch slots for bras.
If the closet design allows, a fold-down ironing board or pull-out hamper integrates laundry prep. Wall-mounted ironing boards hinge flat against the wall when not in use, requiring only 4 inches of depth. Hampers on glides fit in 12-inch-wide cubbies and keep dirty clothes out of sight.
Always wear safety goggles when cutting or drilling, and use a dust mask if sanding MDF or particleboard, both materials produce fine, irritating dust.
Budget-Friendly DIY Upgrades for Instant Impact
Transforming a small walk-in doesn’t require a full gut job. Start with a fresh coat of paint and new lighting, these two upgrades alone run $50–$150 in materials and deliver immediate visual improvement. Use a paint roller for walls and a 2-inch angled brush for trim and corners. One gallon of quality paint covers roughly 350–400 square feet, more than enough for a typical closet.
Replace wire shelving with DIY wood shelves supported by adjustable standards and brackets. A 6-foot closet wall costs about $40–$80 in materials (standards, brackets, and a single sheet of plywood). Cut shelves to length, sand edges smooth, and finish with polyurethane or paint. This upgrade looks built-in but remains adjustable.
Reorganize existing storage before buying new organizers. Group items by category (work clothes, casual, seasonal) and frequency of use. Keep daily-wear garments at eye level, archive off-season pieces high or low, and donate or sell anything unworn in the past year. Many decluttering methods emphasize this step as the foundation of efficient closet design.
Swap plastic hangers for uniform velvet or wooden hangers (available in bulk packs of 50 for $20–$40). Consistent hangers create visual calm and maximize rod space. Add adhesive hooks ($3–$8 per pack) to doors or sidewalls for robes, bags, or hats, no drilling required, and they support up to 5 lbs each.
Install a tension rod in underutilized corners or above existing rods for scarves, belts, or tank tops. Tension rods (adjustable from 24 to 72 inches) cost $10–$20 and require no tools, just twist to lock in place.
For a polished floor, lay peel-and-stick vinyl tiles or a low-pile runner rug. Vinyl tiles cost $1–$3 per square foot and install over most subfloors (clean and level the surface first). Rugs add comfort underfoot and define the closet as a finished space, not an afterthought.
Finally, label shelves, bins, and drawers with a label maker or printable tags. Clear labels (in a consistent font and size) help maintain organization long after the initial setup. This step costs under $20 and prevents the slow drift back to chaos.
Safety note: When installing overhead shelving or lighting, turn off power at the breaker if working near electrical boxes. Use a voltage tester to confirm circuits are dead before handling wires.
Conclusion
A well-designed small walk-in closet proves that square footage matters less than smart planning. By prioritizing vertical storage, investing in adjustable systems, and upgrading lighting, homeowners can rival the function of much larger spaces. Most of these projects require only basic tools, a weekend of work, and a willingness to measure twice and cut once.