Table of Contents
ToggleSmall kitchens aren’t a design flaw, they’re a planning opportunity. With the right approach, a compact kitchen can be just as functional and stylish as a sprawling culinary showcase. The trick is working smarter, not bigger: leveraging vertical space, choosing the right finishes, and picking furniture that earns its footprint. Whether dealing with a galley apartment kitchen or a modest suburban cook space, thoughtful design turns tight quarters into an efficient, attractive hub. This guide covers proven strategies to make every square inch count without tearing down walls or blowing the budget.
Key Takeaways
- Tiny kitchen design ideas prioritize smart storage solutions like pull-out shelves, toe-kick drawers, and wall-mounted magnetic strips to maximize every square inch without renovation.
- Vertical space strategies—including ceiling-mounted pot racks, second-row cabinets, and open shelving—can nearly double usable storage in compact kitchens.
- Light, neutral paint colors and high-gloss cabinet finishes combined with under-cabinet LED lighting make small kitchens feel larger and more functional.
- Efficient layouts following the work triangle principle (keeping the sink, stove, and refrigerator within 15–20 feet) reduce unnecessary steps and improve workflow in galley, L-shaped, or U-shaped configurations.
- Multi-functional furniture and combination appliances—such as rolling islands, fold-down tables, and slimline dishwashers—eliminate clutter while providing essential prep and dining surfaces.
- Design restraint with streamlined hardware, classic subway tile backsplashes, and integrated appliances adds style to tiny kitchens without overwhelming the compact space.
Smart Storage Solutions for Compact Kitchens
Storage is the biggest challenge in a tiny kitchen, and solving it requires using every available surface, including the ones most people ignore.
Cabinet modifications can nearly double usable space. Install pull-out shelves in base cabinets to eliminate the black hole at the back. Add drawer organizers with adjustable dividers for utensils, measuring cups, and tools. Consider a lazy Susan in corner cabinets to access items without crawling inside. Toe-kick drawers (those 3–4″ spaces beneath lower cabinets) are perfect for flat items like baking sheets, cutting boards, or dish towels. They require custom installation but use otherwise wasted space.
Magnetic knife strips mounted on walls or the side of a cabinet free up counter and drawer real estate. Similarly, a pegboard backsplash behind the stove or sink keeps frequently used tools within arm’s reach without cluttering drawers. Use S-hooks to hang ladles, whisks, and measuring spoons. Paint the pegboard to match the wall color if the workshop look isn’t the goal.
For pantry items, clear stackable bins with labels turn chaotic shelves into organized zones. Group by category: baking supplies, snacks, canned goods. Stackable bins make use of vertical cabinet space that’s often underutilized. If there’s no pantry, a narrow rolling cart (12–18″ wide) can slide between the fridge and wall, holding spices, oils, and dry goods.
Vertical Space Strategies
Most kitchens have at least 12–18″ of unused wall space above upper cabinets and below the ceiling. Add a second row of cabinets if ceiling height allows, even shallow 6″ deep units work for storing serving dishes, small appliances, or bulk items used infrequently. This is a bigger renovation project that may require a carpenter, but it dramatically increases storage.
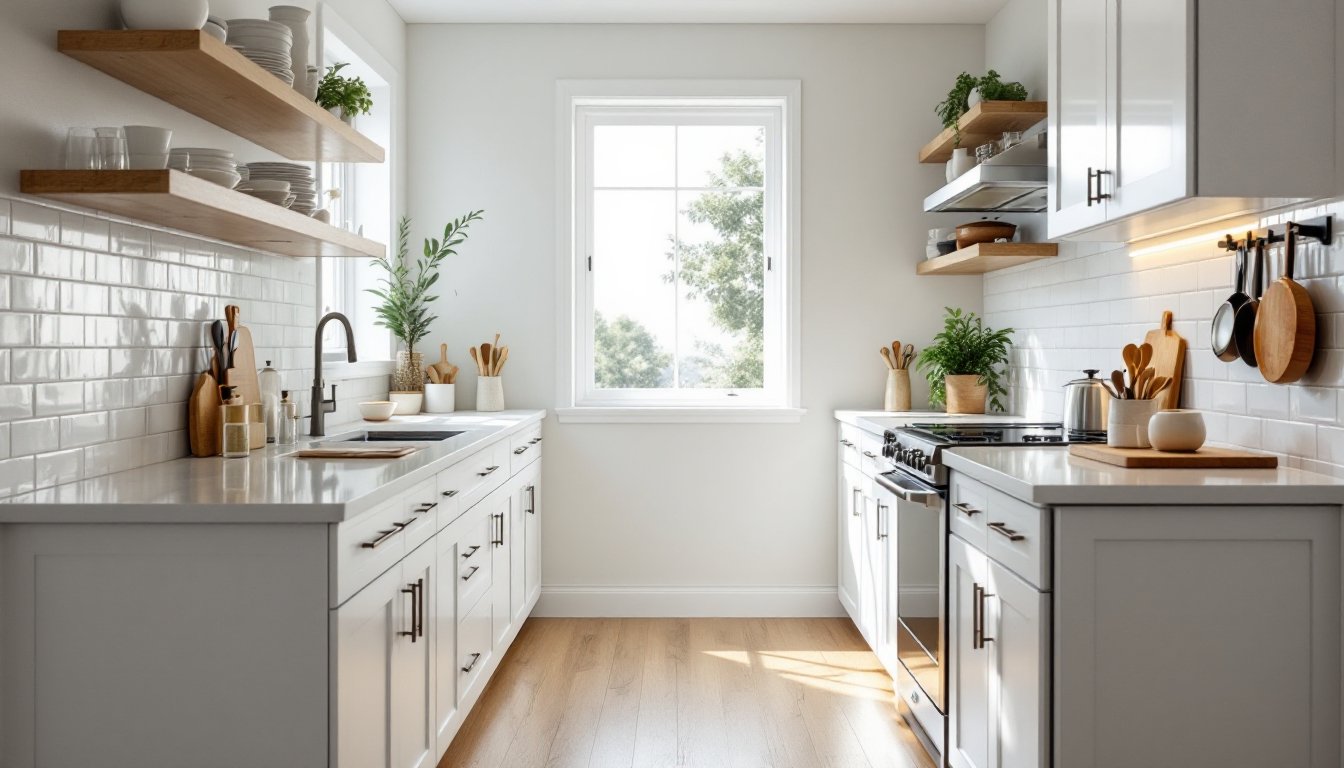
Open shelving is a budget-friendly alternative. Mount heavy-duty brackets rated for at least 50 lbs per pair (look for steel or wrought iron, not hollow aluminum). Use shelves for everyday dishes, glassware, or mugs. Keep it visually calm by sticking to a limited color palette or matching dishware. Open shelves work best when contents are used daily, dust on decorative items becomes a chore.
Ceiling-mounted pot racks reclaim cabinet space occupied by bulky cookware. A simple 2′ × 3′ steel rack with S-hooks holds 8–12 pots and pans. Ensure it’s anchored into ceiling joists or use heavy-duty toggle bolts rated for the weight. If the kitchen has low ceilings (under 8′), a wall-mounted rack over the stove or sink is a better fit.
Over-the-door organizers on pantry or cabinet doors add slots for foil, plastic wrap, sandwich bags, or cleaning supplies. These typically mount with screws or over-the-door hooks and cost under $20.
Color and Lighting Tricks to Make Small Kitchens Feel Larger
Paint and light won’t add square footage, but they change how a space feels, and in a tiny kitchen, perception matters.
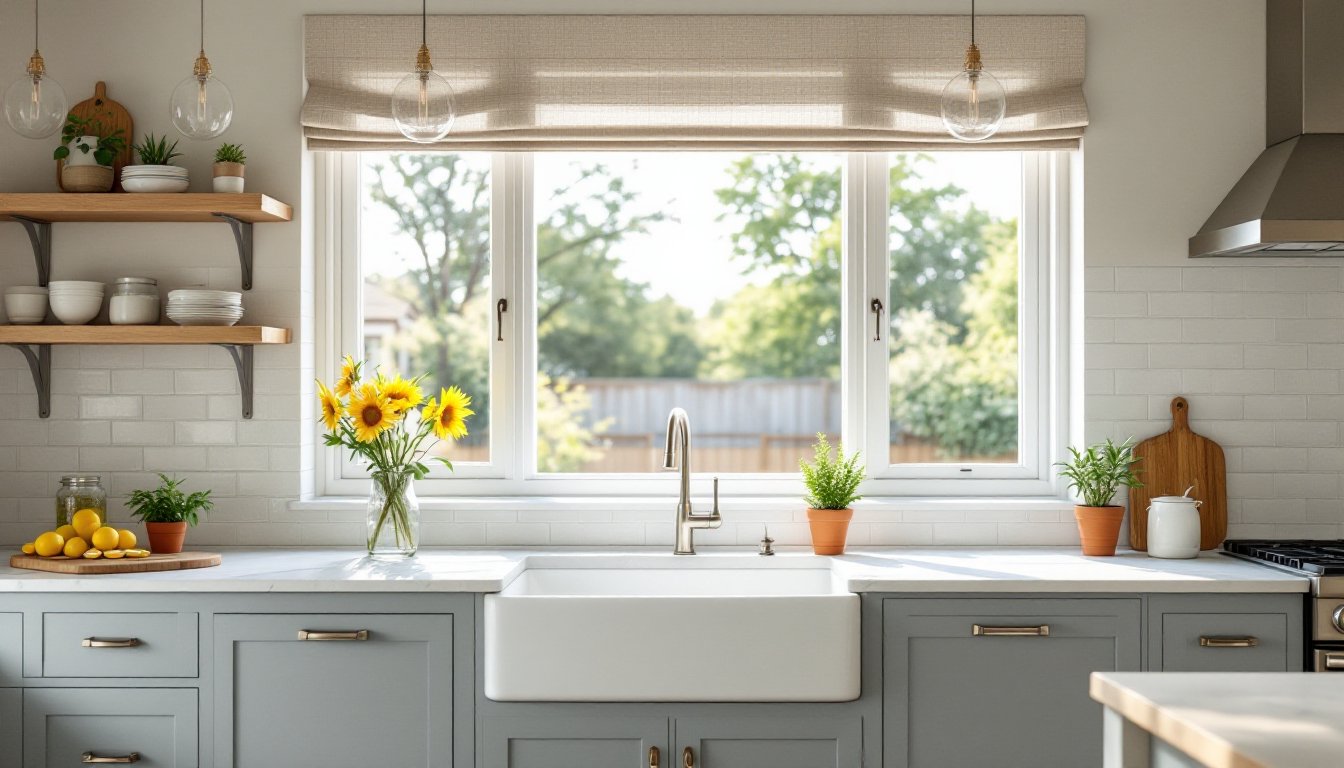
Light, neutral paint colors reflect more light and visually expand walls. White, soft gray, or warm beige are reliable choices. If the kitchen gets good natural light, cooler tones (light gray, pale blue) keep it feeling fresh. In dim kitchens, warm whites or cream prevent a cold, clinical vibe. Skip bold accent walls in small spaces, they chop up sightlines and make the room feel smaller.
High-gloss or satin finishes on cabinets bounce light around the room better than matte. A fresh coat of semi-gloss white paint on old cabinets (after proper prep: cleaning, sanding, priming with a bonding primer like Zinsser B-I-N) can transform the space for under $100 in materials. If painting cabinets, remove doors and hardware, work in a well-ventilated area, and use a foam roller for smooth results. Let each coat dry fully, rushing leads to streaks and poor adhesion.
Under-cabinet LED strip lighting improves task lighting and adds a modern touch. Hardwired options look cleanest but require basic electrical skills (turn off breaker, connect to a switched circuit). Plug-in versions with adhesive backing are a simpler DIY install. Look for 3000K–4000K color temperature for bright, neutral light that doesn’t feel harsh. Avoid the bluish 5000K+ LEDs common in cheap kits, they make food look unappealing.
Pendant lights over a small island or table draw the eye upward, creating a sense of height. Choose fixtures with open or translucent shades that don’t block sightlines. A single well-placed pendant is better than a cluster in a tight space.
Mirrors aren’t common in kitchens, but a mirrored backsplash (usually antique mirror tiles with a protective backing) reflects light and creates depth. Installation is similar to standard tile: apply thinset mortar with a notched trowel, set tiles with spacers, and seal edges with clear silicone instead of grout. Wear safety glasses and cut-resistant gloves when handling mirror tiles.
Layout and Workflow Optimization
Even a small kitchen can function smoothly if the layout respects the work triangle, the path between sink, stove, and refrigerator. In a compact space, keeping that triangle tight (15–20 feet total perimeter) reduces unnecessary steps.
Galley kitchens (two parallel counters) are naturally efficient if the aisle is at least 42″ wide for one cook, or 48″ if two people need to pass. Any narrower feels cramped: any wider wastes steps. Keep the sink and stove on opposite walls to avoid congestion.
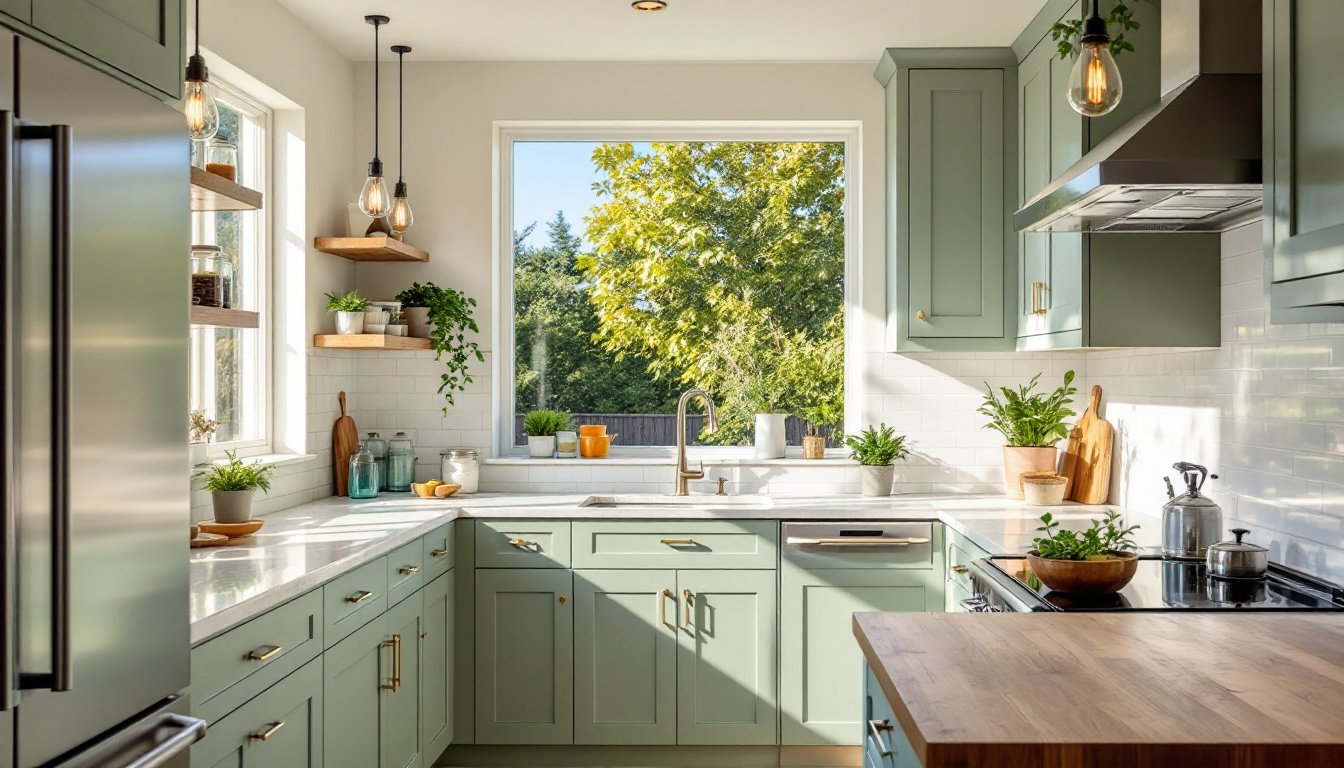
L-shaped layouts work well in square or slightly rectangular spaces. Position the sink at the corner (with a corner sink base cabinet) to maximize counter runs on both sides. This setup often fits a small peninsula or breakfast bar on one end, adding seating without a separate table.
U-shaped kitchens pack maximum storage and counter space into a small footprint but require at least 8′ × 8′ to avoid feeling boxed in. If space is tighter, skip one leg of the U and go with an L.
Rolling islands or carts provide extra prep surface and storage without the permanence of built-ins. Look for models with locking casters, a butcher block or stainless steel top, and shelves or drawers below. A 24″ × 36″ cart fits in most small kitchens and tucks against a wall when not in use. The best options have a top surface that overhangs slightly, allowing bar stools to slide underneath.
If the layout feels awkward but a full remodel isn’t in the cards, small tweaks help. Swap a hinged cabinet door for a pocket door or remove it entirely to create open shelving. Replace a standard-depth fridge (30–34″ deep) with a counter-depth model (24–27″ deep) to gain floor space and improve flow. Counter-depth fridges cost more and hold less, but in a tight kitchen, the tradeoff is often worth it.
Multi-Functional Furniture and Appliances
In a tiny kitchen, every item should earn its place by doing double duty.
Drop-leaf or fold-down tables provide dining or prep space when needed and tuck away when not. Wall-mounted versions fold flat and support 50+ lbs when locked in place. Pair with folding chairs stored in a nearby closet or hung on wall hooks.
Kitchen islands with built-in seating replace a separate dining table. A 36″ × 48″ island with a 12″ overhang on one side accommodates two stools and adds prep surface plus storage below. If building a custom island, include electrical outlets on the end or side (not the top) to meet code and add functionality for small appliances.
Combination appliances reduce clutter. A microwave-convection oven combo replaces two separate units. Similarly, an induction cooktop with a built-in downdraft vent eliminates the need for an overhead range hood, freeing up wall space for cabinets. These specialized appliances cost more upfront but make sense in extremely tight layouts.
Slimline dishwashers (18″ wide instead of the standard 24″) fit into layouts where a full-size unit won’t. They hold 8–10 place settings instead of 12–16, which is plenty for one or two people. Installation is the same as a standard dishwasher: connect to hot water supply, drain line, and 120V electrical (requires a dedicated 15A or 20A circuit per NEC).
There’s a growing market for compact renovation solutions designed specifically for small spaces. Apartment-sized ranges (20″ or 24″ wide) and compact refrigerators with bottom freezers squeeze into layouts where standard 30″ appliances won’t fit. Check exact dimensions, nominal sizes and actual sizes differ, especially with refrigerators where hinge and door swing clearance matter.
Under-counter appliances like wine fridges, beverage coolers, or drawer-style microwaves keep countertops clear. If adding an under-counter unit, ensure adequate ventilation per manufacturer specs, most need 1–2″ clearance on sides and back.
Design Details That Add Style Without Clutter
Small kitchens benefit from restraint. A few well-chosen details have more impact than a dozen competing ideas.
Streamlined hardware keeps cabinets looking clean. Simple bar pulls or recessed pulls (which sit flush with the door) work better than ornate knobs. For a seamless look, consider touch-latch cabinets with no visible hardware at all. Retrofitting costs around $3–5 per door for the latches.
Subway tile backsplashes remain a go-to because they’re affordable, timeless, and easy to install. Standard 3″ × 6″ ceramic tiles run $1–3 per square foot. Larger formats like 4″ × 12″ or 6″ × 12″ have fewer grout lines, which makes small spaces feel less busy. For a bolder look without overwhelming the space, tile just the area behind the stove or sink instead of the entire backsplash.
When selecting tile, coordinate with the existing design trends but don’t chase every fleeting fad. Classic patterns and neutral tones age better than trendy colors.
Floating shelves (with hidden brackets) have a lighter visual presence than bulky upper cabinets. Use ¾” thick hardwood or plywood cut to size and finished with polyurethane or paint. Mount with heavy-duty floating shelf brackets anchored into studs. A stud finder is essential, drywall anchors alone won’t support the weight of dishes and glassware.
Integrated appliances (panel-ready dishwashers and fridges that accept cabinet fronts) create a built-in look and reduce visual clutter. These appliances cost 20–40% more than freestanding equivalents but blend seamlessly into cabinetry. If budget allows, it’s a worthwhile upgrade in a small, visible kitchen.
Glass-front cabinet doors on a few uppers create depth without the cost of removing cabinets entirely. Retrofit existing doors by removing the center panel, cutting a rabbet for glass, and installing ⅛” tempered glass with glazier points and trim. This is a manageable DIY project with a router and rabbet bit, but a cabinet shop can do the conversion for $30–50 per door.
Many small kitchen transformations share common moves found in popular renovation examples that prioritize function and simplicity over excess.
Conclusion
Tiny kitchens demand intentionality. Every finish, fixture, and inch of storage matters more than in a spacious layout. The best small kitchen designs don’t try to disguise their size, they embrace efficiency and make smart tradeoffs. Start with storage and layout, layer in light and color, and finish with details that add personality without crowding the space. The result is a kitchen that works hard and looks great, regardless of square footage.