Table of Contents
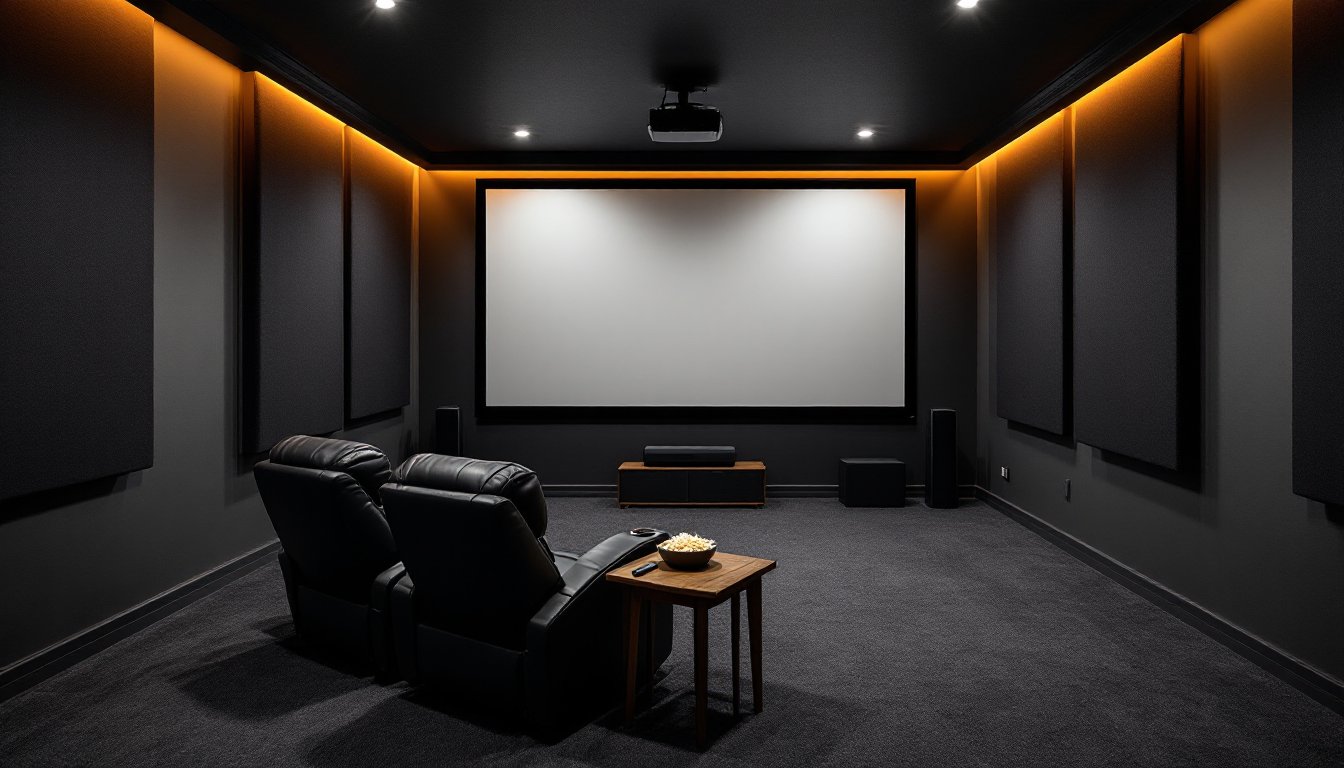
ToggleBasements often become cluttered storage zones or forgotten square footage, but with some planning and the right approach, they can transform into dedicated entertainment spaces. A small basement home theater offers privacy, darkness, and isolation from household noise, three things that traditional living rooms can’t easily provide. The project doesn’t require Hollywood-level budgets or professional installers. Most homeowners can tackle the core elements themselves with basic tools and a weekend or two of focused work. This guide walks through the practical steps to turn a cramped, underused basement into a functional screening room that rivals commercial cinemas.
Key Takeaways
- Small basement home theater ideas thrive in below-grade spaces because concrete walls provide natural sound isolation, minimal light bleed, and dedicated use separate from household activities.
- Check humidity levels before starting your project—consistent moisture above 60% requires waterproofing and drainage fixes before electronics are installed.
- For optimal viewing, position your screen at 1.5 to 2.5 times its width distance from the back row; smaller basements work better with large-format TVs than projectors requiring long throw distances.
- A 5.1 surround sound setup (five speakers plus subwoofer) offers the best balance for small rooms, with affordable DIY acoustic panels costing $15–$25 each for controlling basement echo.
- Theater seating consumes the largest budget but prioritizes lumbar support and adequate clearance for reclining mechanisms (8–10 inches behind the seat back).
- Swap hollow-core doors for solid-core alternatives and add weatherstripping to reduce noise bleed by 10–15 decibels, preventing late-night movie sounds from disturbing upper floors.
Why Basements Are Perfect for Home Theaters
Basements solve the three biggest home theater challenges naturally: light control, sound isolation, and dedicated use. Small windows or no windows mean less bleed from streetlights or daytime sun, eliminating the need for expensive blackout treatments. Concrete or block foundation walls provide built-in sound barriers that keep movie audio from disturbing bedrooms above.
The below-grade location also means theater use won’t interfere with daily household activities. Kids can watch a matinee while someone cooks dinner upstairs. Unlike repurposing a living room, a basement theater stays set up permanently, no shuffling furniture or reconnecting cables before each viewing.
Most basements already have the infrastructure in place: electrical outlets, climate control via existing HVAC runs, and in many cases, rough-in plumbing if a wet bar or bathroom addition makes sense later. For homeowners exploring broader renovation planning, a theater project offers high impact with moderate effort.
One caution: check for moisture issues before starting. Run a dehumidifier for a week and monitor humidity levels. Anything consistently above 60% needs addressing first, waterproofing, foundation sealing, or improved drainage. Electronics and damp spaces don’t mix, and mold will ruin seating and acoustics.
Space Planning and Layout for Small Basement Theaters
Small basements demand ruthless space efficiency. Measure the room’s actual dimensions, not the floor plan estimate, and account for ductwork, support posts, and low-clearance zones. Standard basement ceiling height runs 7 to 8 feet, which works fine for seating but limits overhead speaker placement.
The ideal viewing distance for a projector setup is 1.5 to 2.5 times the screen width. For a 100-inch diagonal screen (roughly 87 inches wide), that means 11 to 18 feet from the screen to the back row. If the room’s shorter, consider a smaller screen or a large-format TV instead.
Arrange seating to avoid placing chairs directly under HVAC vents or in front of the projector throw path. If the basement has a support column, work it into the layout, wrap it with acoustic panels or build it into a faux wall that hides wiring.
For rooms under 200 square feet, single-row seating makes the most sense. Tiered or stadium seating eats up floor space and requires platform framing, which reduces headroom. Save tiered layouts for basements with 9-foot ceilings or higher.
Don’t forget egress. Most jurisdictions require a basement bedroom or habitable space to have an egress window meeting IRC standards (minimum 5.7 square feet of opening, no higher than 44 inches from the floor). A home theater technically falls into a gray area, but if it’s a finished space where people spend extended time, check local code. Non-compliance can complicate future home sales.
Essential Equipment and Screen Placement
Projector vs. Large TV is the first decision. Projectors deliver true cinema scale but require a dark room and regular bulb replacements (every 3,000–5,000 hours for lamp-based models). LED or laser projectors cost more upfront but skip the bulb hassle.
A 65- to 75-inch 4K TV works well in basements under 12 feet deep, especially if ambient light control isn’t perfect. Modern TVs handle HDR content better than budget projectors, and there’s no throw distance to calculate.
For projectors, mount the unit to the ceiling joists using a universal projector mount (around $30–$60). Locate studs or joists with a stud finder, drill pilot holes, and use 3-inch lag bolts into solid wood. Drywall anchors won’t hold the weight reliably.
Screen placement should center on the longest wall with no windows or doors interrupting sightlines. Fixed-frame screens offer the flattest surface, but retractable screens save space in multipurpose basements. Mount screens so the bottom edge sits 24 to 36 inches off the floor, high enough that seated viewers in the front row don’t crane their necks, low enough that those in back aren’t staring at the ceiling.
For sound, a 5.1 surround setup (five speakers plus subwoofer) is the sweet spot for small rooms. According to basement theater design principles, place the center channel directly above or below the screen, front left and right speakers at 22–30 degrees from center seating, and surrounds at 90–110 degrees to the sides.
Run speaker wire before finishing walls if possible. Use 16-gauge wire for runs under 50 feet, 14-gauge for longer distances. Label every wire at both ends. Wall-mounting surrounds keeps floor space clear, use adjustable brackets to angle drivers toward seating.
Soundproofing and Acoustic Solutions on a Budget
True soundproofing, blocking sound from entering or leaving, requires decoupling walls from studs, adding mass, and sealing air gaps. That’s expensive and often overkill for a basement theater. Focus instead on acoustic treatment to improve sound quality inside the room.
Basement concrete walls reflect sound harshly. Add acoustic panels to the first reflection points: the wall sections directly to the left and right of the seating position, and the wall behind the screen. DIY panels cost $15–$25 each using 2-inch rigid fiberglass insulation (Owens Corning 703 or Roxul Safe’n’Sound), wrapped in fabric and mounted in simple wood frames.
For homeowners tackling broader updates, pairing theater acoustics with whole-home improvements can streamline material orders and contractor scheduling.
Ceiling treatment matters too. Suspend acoustic ceiling tiles (Armstrong or similar) in a drop-ceiling grid, or install fabric-wrapped panels between exposed joists. Both methods reduce echo and prevent sound from bouncing up through the subfloor above.
Carpet or thick area rugs on the floor absorb mid- and high-frequency reflections. Concrete slab floors are the worst acoustic offenders in basements. If budget allows, install carpet with 8-pound padding, the padding does more acoustic work than the carpet itself.
For actual soundproofing, focus on the door. Swap a hollow-core door for a solid-core door (around $150–$250) and add weatherstripping around the frame. A door sweep at the bottom blocks the biggest sound leak. These simple upgrades cut noise bleed by 10–15 decibels, enough that loud action scenes won’t wake anyone upstairs.
Lighting Design That Sets the Mood
Theater lighting needs to do two things: stay out of the way during viewing and provide enough illumination for safe movement when the movie’s paused. Overhead can lights or recessed LEDs aimed at seating create screen glare and ruin contrast.
Install dimmable LED strips along the baseboards or under riser platforms if using tiered seating. Warm white (2700–3000K) works better than cool white, it’s easier on the eyes during late-night sessions. Wire strips to a smart dimmer switch so brightness adjusts from a phone or voice assistant.
Sconces mounted on the back or side walls (never opposite the screen) provide enough light for intermission without spilling onto the viewing surface. Position them 60 to 66 inches off the floor, centered between studs. Use low-wattage bulbs (40W equivalent LED) to avoid overpowering the space.
Some builders like to add fiber-optic star ceiling kits for ambiance. They’re purely cosmetic but can define the space as a dedicated theater rather than a multipurpose room. Kits run $100–$300 depending on coverage area. Installation involves drilling tiny holes in ceiling drywall or tiles and threading fiber strands through to a central light source.
Avoid placing any light source within 30 degrees of the viewer’s line of sight to the screen. That includes exit signs, standby LEDs on equipment, or RGB accent strips behind the screen. If gear has bright indicator lights, cover them with black electrical tape or disable them in settings.
Seating and Comfort Maximization
Theater seating eats up the largest portion of most budgets, but it’s where comfort lives. Dedicated home theater recliners with cupholders and power controls start around $400 per seat. For tighter budgets, gaming chairs or oversized recliners from big-box stores work fine, prioritize lumbar support and seat depth over branding.
In small basements, loveseat-style recliners (two seats on a shared frame) save floor space compared to individual chairs. Many models include a center console with storage for remotes and charging cables.
Measure seat width before buying. A standard theater recliner runs 38 to 42 inches wide. Three seats need at least 10.5 feet of wall space, plus clearance for reclining mechanisms (usually 8–10 inches behind the seat back).
Ideas from small-space theater builds show that modular sectional sofas can work in multipurpose basements, especially if the room doubles as a guest space or game room.
Don’t overlook side tables or armrest surfaces. Viewers need a place to set drinks and snacks within arm’s reach. If using individual recliners without built-in cupholders, add small nesting tables between seats.
For temperature control, basements tend to run cooler than upper floors. Keep a couple of fleece throws or blankets on a wall-mounted rack or in a storage ottoman. A small space heater with auto shut-off adds comfort during winter months without overworking the HVAC system.
Safety note: Secure heavy recliners to wall studs using furniture straps if kids will use the space. Tip-over accidents happen, especially with powered recliners that shift weight distribution.
Conclusion
A small basement home theater proves that dedicated entertainment spaces don’t require massive square footage or five-figure budgets. Solid planning, attention to acoustics, and smart equipment choices turn underused basements into functional screening rooms. Start with the bones, moisture control, layout, and wiring, then layer in comfort and style as budget allows.