Table of Contents
ToggleA well-designed wood deck doesn’t just add square footage to a home, it creates a transition zone between indoor comfort and outdoor living. Whether someone is working with a compact backyard or a sprawling lot, the right deck layout, material choice, and detail work can turn an underused yard into a functional entertaining hub, quiet retreat, or outdoor dining room. The challenge isn’t finding ideas, it’s choosing a design that matches both the home’s architecture and how the space will actually be used. From classic single-level platforms to multi-tier layouts with integrated seating, the options are vast but grounded in a few core decisions: framing approach, wood species, railing style, and finish.
Key Takeaways
- Single-level platform decks remain the most popular wood deck design choice because they’re straightforward to build, permit-friendly, and adaptable to most home styles.
- Multi-level wood deck layouts solve sloped terrain challenges by stepping down 7–10 inches between levels, allowing each zone to serve a different function like dining, fire pits, or lounging.
- Cable railing systems offer a modern alternative to traditional wood railings, maintaining sightlines while meeting code requirements at a cost of $60–100 per linear foot installed.
- Material choice significantly impacts longevity and maintenance—pressure-treated pine costs $2–3 per linear foot, while tropical hardwoods like ipe deliver 25+ year lifespans at $8–15 per linear foot.
- Semi-transparent stains preserve natural wood grain and require application in 50–90°F conditions with 48 hours dry time before rain exposure, making proper surface preparation essential for long-lasting finishes.
- Built-in features like storage benches, planter boxes, and cooler wells maximize functionality without sacrificing deck space, and all components should use galvanized or stainless steel fasteners to prevent rust staining.
Classic Wood Deck Designs for Timeless Appeal
Single-level platform decks remain the most popular choice for a reason, they’re straightforward to build, permit-friendly, and adaptable to most home styles. A rectangular or L-shaped deck attached to the back of a house provides clean sightlines and simple framing, typically using 2×8 or 2×10 joists spaced 16 inches on center over a beam-and-post foundation.
For homes with traditional or colonial architecture, a deck with picture-frame borders and diagonal or herringbone decking patterns adds visual interest without requiring complex structural changes. The border uses the same decking material but runs perpendicular to the field boards, creating a finished edge that hides end grain and gives the deck a crafted look.
Another timeless approach is the wraparound deck, which extends along two or more sides of the home. This works especially well on corner lots or homes with multiple entry points. Framing requires careful attention to ledger board attachment and flashing details to prevent water intrusion, but the payoff is flexible outdoor access and improved curb appeal. Many porch and deck designs in the South use this wraparound style to maximize shaded outdoor living space.
Keep decking boards running parallel to the house for the simplest installation and least material waste. For a 12×16-foot deck, expect to use about 300-350 linear feet of 5/4×6 decking, depending on spacing and waste factor.
Modern Multi-Level Deck Layouts
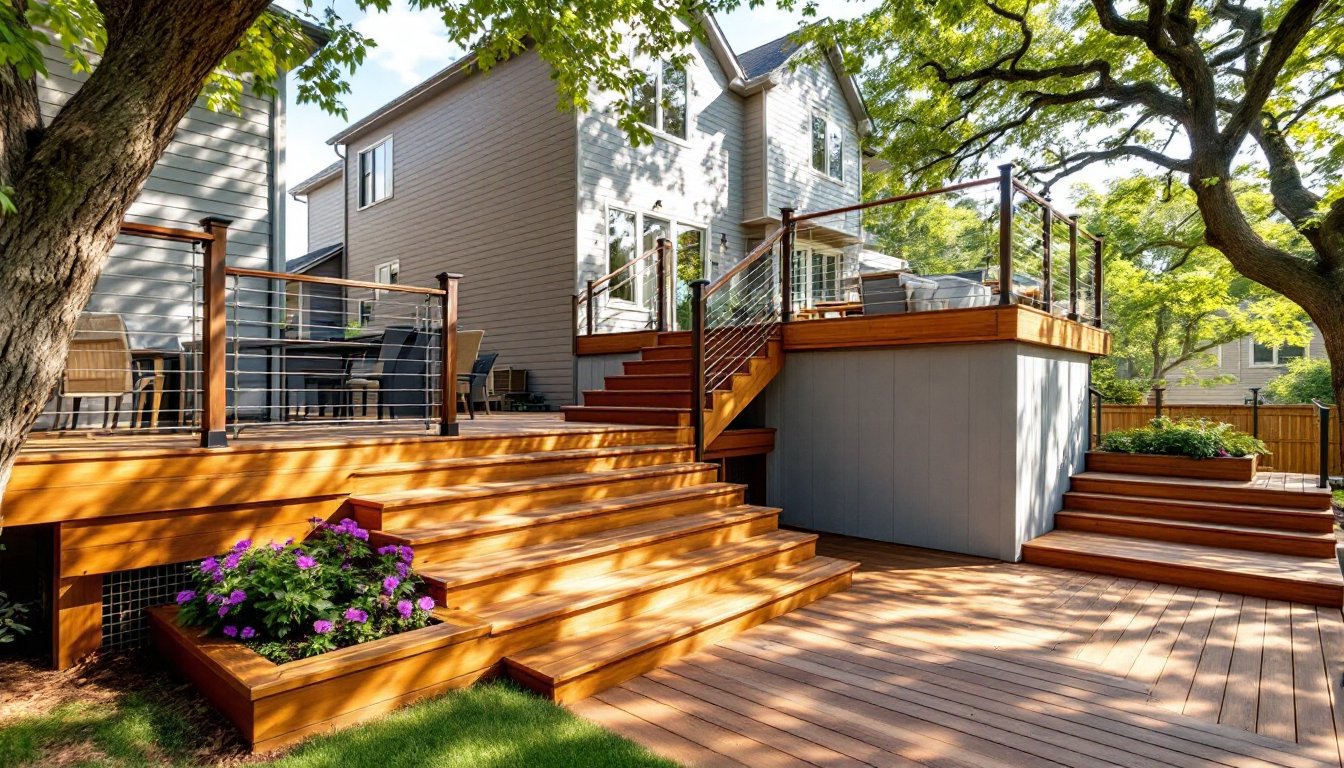
Multi-level decks solve two common problems: sloped terrain and the need for defined outdoor zones. Instead of fighting a grade change with extensive grading or retaining walls, a stepped deck follows the natural contour, with each level serving a different function, upper level for dining, lower level for a fire pit or lounge area.
Each level change typically drops 7-10 inches (one or two steps), which keeps the transition comfortable and code-compliant without requiring a full staircase between zones. Framing becomes more complex, as each level needs independent ledger attachment or freestanding post support, and beams must be carefully sized to handle cantilevered loads if one level overhangs another.
Modern designs often incorporate floating stairs between levels, open-riser treads supported by a single central stringer or hidden steel brackets. This keeps sightlines open and reduces the visual bulk of the transition. Stairs should meet IRC requirements: maximum 7.75-inch rise and minimum 10-inch tread depth, with consistent riser height throughout the run.
For a clean contemporary look, run decking boards continuously across level changes where possible, or use contrasting board direction to visually separate zones. A multi-level deck on a sloped lot might use composite or PVC for the upper level (high visibility, low maintenance) and pressure-treated framing with cedar or redwood decking below, where shade and lower traffic justify the cost difference.
Permit requirements increase with multi-level designs, especially if total deck height exceeds 30 inches above grade at any point. Plan on engineered drawings if the deck is freestanding or includes significant cantilevers.
Creative Deck Railing and Border Options
Railing shifts a deck from utilitarian platform to finished outdoor room, and code mandates it for any deck over 30 inches above grade. Standard wood railing, 4×4 posts, 2×4 top and bottom rails, and 2×2 balusters spaced no more than 4 inches apart, gets the job done but can feel heavy, especially on smaller decks.
Cable railing offers a modern alternative with thin stainless steel cables tensioned between posts, maintaining sightlines while meeting code. Cables must be spaced no more than 4 inches apart vertically, and posts need blocking or reinforcement to handle the lateral tension load (typically 200 pounds per linear foot). Systems from manufacturers like Feeney or RailEasy include pre-drilled posts and turnbuckle hardware, but expect to pay $60-100 per linear foot installed.
For a craftsman or traditional look, consider horizontal board railings using 1×4 or 1×6 boards spaced vertically, or decorative balusters with routed profiles. Glass panel inserts, tempered safety glass set into routed channels in the top and bottom rails, work well on upper-level decks with views, though they require more frequent cleaning and run $100-150 per linear foot.
Integrated planter boxes built into the railing cap add greenery without sacrificing deck space. Use pressure-treated or rot-resistant lumber for the planter frame, line with pond liner or heavy plastic, and drill drainage holes through the bottom rail. Keep soil depth to 8-10 inches for annuals and herbs, anything deeper adds significant weight and may require additional post blocking.
Whatever railing style is chosen, post spacing should not exceed 6 feet for wood systems, and all railings must be 36-42 inches tall measured from the deck surface.
Built-In Seating and Storage Solutions
Built-in benches eliminate the need to move furniture for winter storage and create clean, space-efficient seating. A basic deck bench uses 2×4 framing attached to deck posts or blocking, with a 2×10 or 2×12 seat cap. Standard bench height is 18 inches, with a seat depth of 15-18 inches for comfortable sitting.
For added function, build storage compartments under flip-up bench seats. Frame a box using 2x4s, add piano hinges to the seat cap, and line the interior with treated plywood or composite to protect stored cushions, grill tools, or outdoor toys. Include gas struts to hold the lid open and drill small drain holes to prevent water accumulation.
L-shaped corner benches make efficient use of deck corners and can incorporate planter boxes or side tables at the ends. For outdoor entertaining, a built-in bar or serving counter along one railing section provides a functional prep zone, use a 2×12 or wider cap at bar height (42 inches) with knee space below.
Another smart integration: built-in cooler wells. Frame a rectangular opening in the deck, drop in a galvanized tub or heavy-duty plastic bin, and trim the edges with decking. Add a hinged lid flush with the deck surface for a hidden cooler that doesn’t take up floor space. Make sure framing underneath can support the load of ice and beverages (a full cooler can weigh 150+ pounds).
All built-ins attached to the deck structure should use hot-dipped galvanized or stainless steel fasteners to prevent rust staining. If bench framing ties into railing posts, verify that posts are properly blocked and secured to handle the additional lateral load.
Choosing the Right Wood Species for Your Deck
Material choice affects longevity, maintenance, and total cost more than any design detail. Pressure-treated pine remains the budget standard, widely available, code-compliant for ground contact, and reasonably durable when properly maintained. Expect to pay $2-3 per linear foot for 5/4×6 decking. The tradeoff: it requires annual cleaning and staining, is prone to warping and checking, and the greenish tint takes time to weather.
Cedar and redwood offer natural rot resistance, dimensional stability, and a warm, finished appearance right off the rack. Western red cedar runs $4-6 per linear foot, while redwood (especially heartwood grades) can hit $8-12. Both species are softer than pressure-treated lumber, so they’ll dent and scratch more easily in high-traffic areas, but they take stain beautifully and age to a silver-gray patina if left untreated.
For maximum durability, tropical hardwoods like ipe, cumaru, or tigerwood deliver 25+ year lifespans with minimal maintenance. Ipe is dense enough to dull saw blades and requires pre-drilling for every fastener, but it’s nearly impervious to rot, insects, and UV damage. Expect $8-15 per linear foot and factor in the cost of carbide-tipped blades and specialized fasteners. Installation takes longer, pilot holes are mandatory, and the wood’s density makes it hard on tools.
Composite and PVC decking aren’t wood, but they’re worth mentioning for comparison. These materials eliminate the stain-and-seal cycle and resist fading, but they expand and contract more than wood (requiring specific fastener spacing), can feel hot underfoot in direct sun, and cost $5-10 per linear foot depending on the brand.
For a hybrid approach, some builders use pressure-treated lumber for framing and joists, then top with cedar or composite decking. This keeps structural costs down while upgrading the visible surface. If using simple deck construction methods, pressure-treated material works well for both framing and decking in straightforward builds.
Deck Color and Stain Combinations
Raw wood left untreated will gray and weather unevenly, and most species benefit from a protective finish within the first year. Semi-transparent stains let the grain show through while adding UV protection and water repellency, ideal for cedar, redwood, or any wood chosen for its natural character. Most brands cover 150-250 square feet per gallon depending on wood porosity.
Solid-color stains function like thin paint, hiding the grain but offering better coverage on pressure-treated lumber or older decks with uneven weathering. They last longer than semi-transparent stains (3-5 years vs. 2-3 years), but when they fail, they tend to peel rather than fade, requiring more aggressive prep for recoating.
Two-tone color schemes can define deck zones or highlight architectural details. A popular approach: natural or light-toned decking with darker stained railings, which grounds the structure and hides dirt on high-touch surfaces. The reverse, dark decking with light rails, creates drama but shows scratches and fading more readily.
For a cohesive look, match the deck stain to existing exterior trim colors, or go one shade darker than siding to create subtle contrast. Grays and weathered tones pair well with modern and coastal home styles, while warm browns and reds suit traditional or rustic architecture.
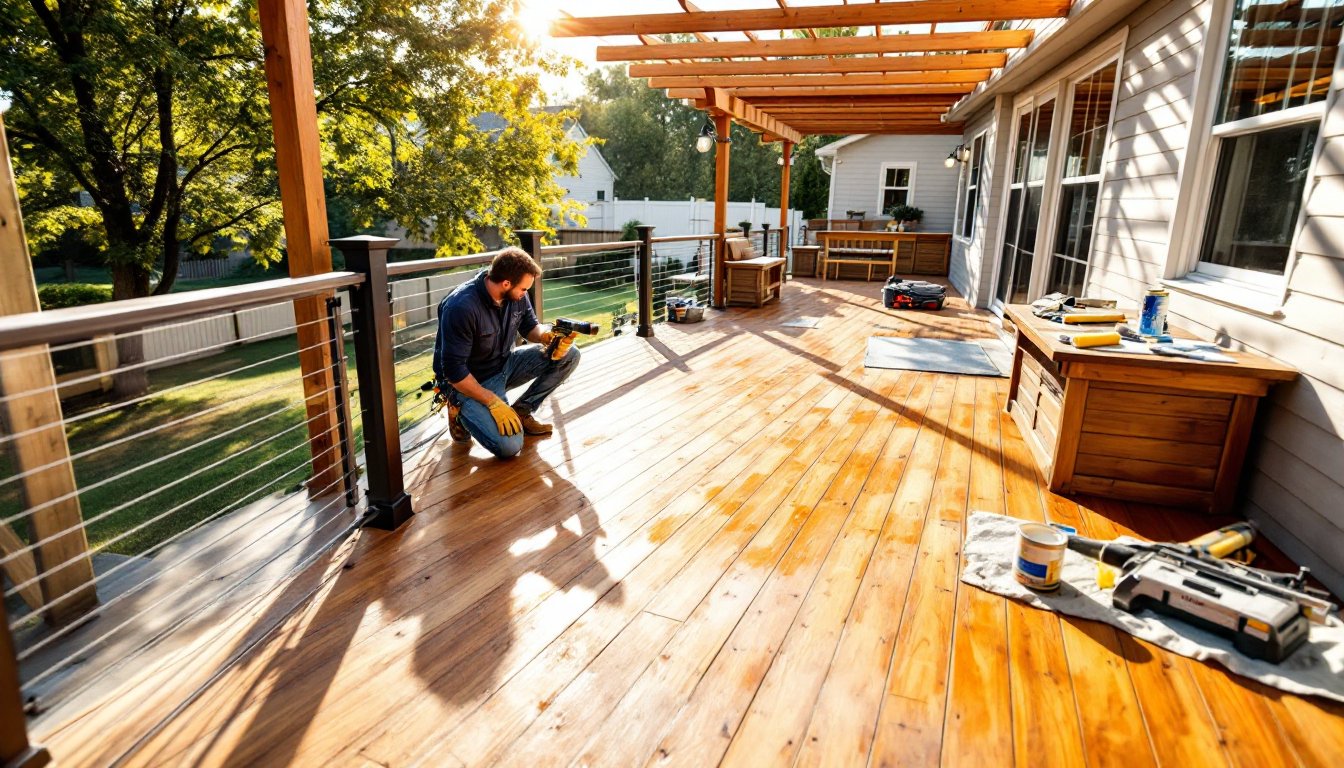
Before staining, clean the deck thoroughly with a deck cleaner or mild TSP solution, rinse, and let dry 48 hours. Sand any rough spots or raised grain with 60-80 grit paper. Apply stain with a pad applicator or pump sprayer, back-brushing to work finish into the grain. Many deck finishing techniques and tutorials emphasize the importance of proper surface prep, it’s the difference between a finish that lasts three years and one that peels in six months.
Always apply stain when temperatures are between 50-90°F, with no rain forecast for 24-48 hours, and avoid direct sun during application to prevent lap marks.
Conclusion
A thoughtfully designed wood deck blends function, aesthetics, and durability. Whether opting for a classic single-level layout or a modern multi-tier design with cable railings and built-in storage, the key is matching materials and details to how the space will be used. Take time on the planning phase, accurate measurements, proper material selection, and attention to code requirements prevent costly rework. With the right prep and finish schedule, a well-built wood deck will deliver years of outdoor enjoyment.